You’ve got this awesome movie idea that’s packed with everything. But as soon as you try to share it with others, you just can’t express your vision correctly.
That’s where a storyboard will help you with!
But how can you achieve that perfect storyboard? It takes some learning and patience. Here are the 5 steps to create a storyboard:
- Define your story’s core idea
- Choose Your Medium (Digital tools or traditional methods)
- Sketch Your Frames
- Add Detailed Annotations
- Review and Revise
To know more about each step, read on.
Understanding Storyboarding
A storyboard is a visual representation of a story. It breaks down the idea into a sequence of drawings or images that outline key moments.
Think of it as a comic strip version of your project. The board is just a planning canvas rather than the final product. Each frame has notes on movement, dialogue, and other micro-details.
Storyboarding turns abstract ideas into something tangible. It gives a roadmap to the creative process. Mainly, organize your thoughts and communicate your vision clearly.
Why Use Storyboards?
[Source: Storyboarding Statistics: USA 2025 | Get Pzazzed !]
Using a storyboard isn’t just about drawing pictures. It’s all about clarity, collaboration, and efficiency. Here’s how it helps:
1. Clarity
Ever tried explaining a movie scene to a friend, only for them to get totally lost?
A storyboard eliminates that confusion. It provides a visual roadmap to your listener. It helps everyone to understand how the project should unfold.
2. Collaboration
Creative projects often involve multiple people. Directors, writers, designers, marketers, and more are involved with the whole procedure.
A storyboard keeps everyone on the same page. It makes it easier to discuss ideas, give feedback, and make improvements before production starts.
3. Efficiency
Changing things after filming or designing can get pricey and time-consuming. Storyboarding helps you spot potential problems early on. So, you can save both time and money by avoiding mistakes.
Where Are Storyboards Used?
Storyboards aren’t just for Hollywood!
They are for different industries. Let’s see how they work in various fields:
1. Film and Animation
Storyboarding is a mandatory step in filmmaking and animation. It is part of planning scenes and sequences. Directors use it to:
- Plan camera angles and movements.
- Visualize action sequences before filming.
- Ensure continuity between shots.
Let’s take animated movies like Frozen or Toy Story as an example.
They have done extensive storyboarding before finalizing any animation. It helps the team to be on board with every detail. They didn’t need to spend any money or time before the actual production.
2. Novels and Writing
Yes, even authors use storyboards!
While writers don’t necessarily draw scenes, they often create visual outlines or index cards to map out:
- Key plot points.
- Character arcs and development.
- Scene sequences and pacing.
For example, J.K. Rowling used a detailed handwritten outline (similar to a storyboard). She keeps track of plot twists in Harry Potter with this method. It helped her to put every piece of the puzzle together perfectly.
3. Marketing and Advertising
Ever wonder how commercials feel so well put together?
Storyboarding does its part in creating engaging ad campaigns by helping marketers:
- Visualize the flow of an ad before filming.
- Ensure the message is clear and impactful.
- Plan social media or video content effectively.
Brands like Apple, Nike, and Coca-Cola use storyboards. They use it to make an advertisement to pop. It ensures the ad is connecting audiences with the right emotions.
Relatable Reads: Top 2D Animation Companies in the USA (2025) – Top 10 Picks – LocalEyes
Essential Elements of a Storyboard
A storyboard is kind of like a brainstorming tool for telling a story. It gives creators a sneak peek of how everything will look on screen.
Before starting production, it’s a must to have a storyboard ready on your desk.
Here are the key elements that will fill up your storyboard:
1. Frames
A frame is basically a single panel that shows a scene or shot.
Each part of the story is like a panel in a comic strip, catching a moment in time.
Why Are Frames Important?
- They help visualize the sequence of events in a clear and organized way.
- They show the team how the story flows from one shot to the next.
- They serve as a guide for filmmakers, animators, and designers during production.
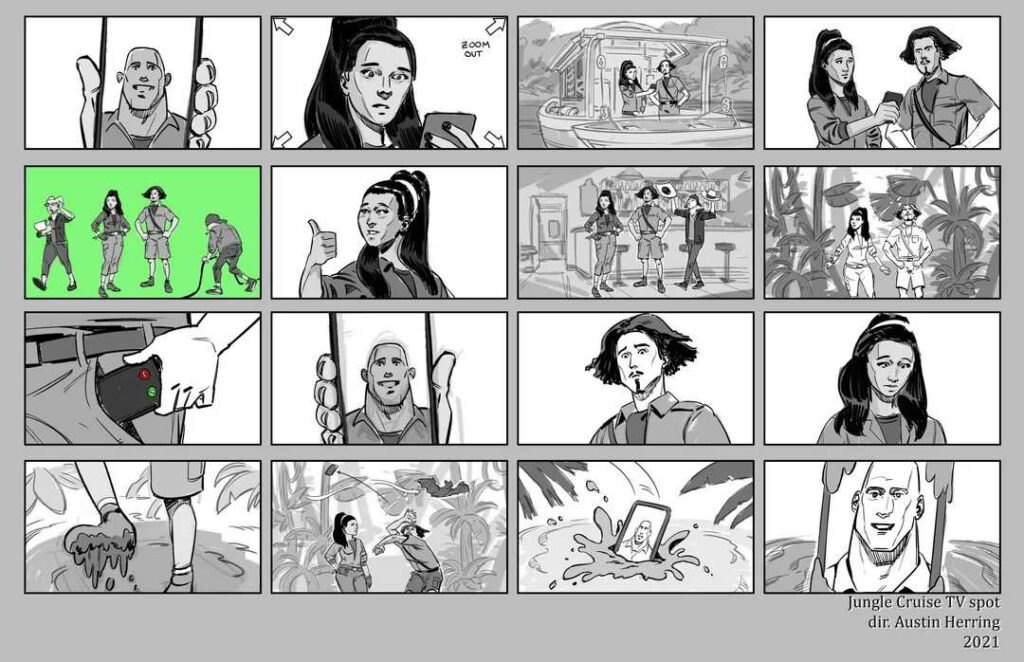
Here’s an example of what a basic storyboard might look like:
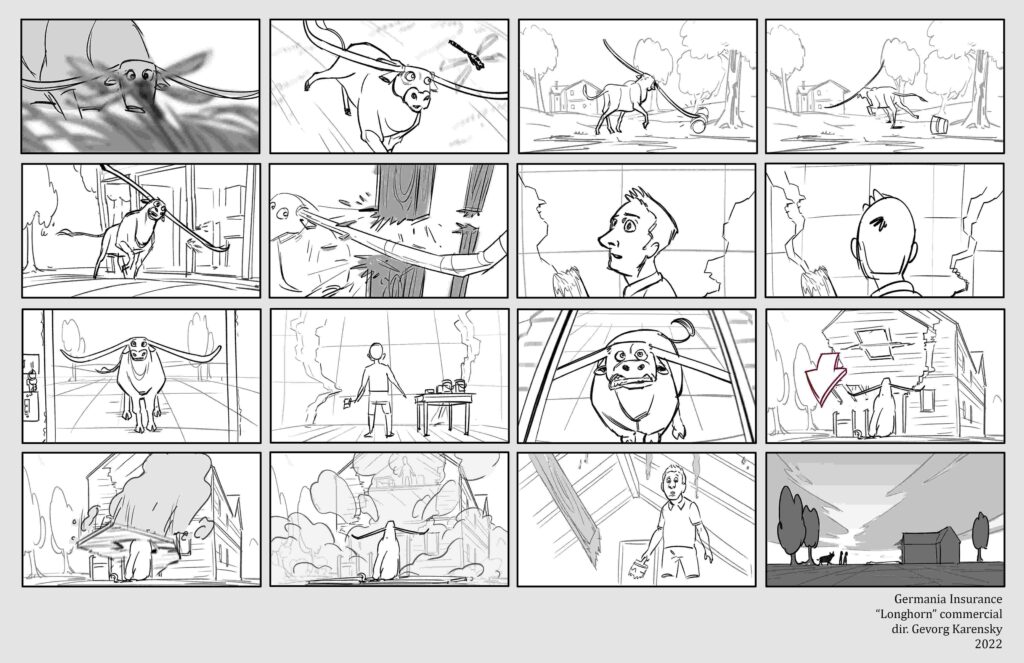
[Source: Reddit]
Each box (or frame) includes illustrations, action notes, dialogue, and camera directions to give a complete picture of the scene.
2. Action Notes
Action notes describe what happens within each frame.
They provide details about:
- Character movements (For example: “The hero runs toward the door.”)
- Scene changes (For example: “The sun sets in the background.”)
- Object interactions (For example: “She picks up the phone and hesitates.”)
Why Are Action Notes Important?
- They guide animators and actors on how the characters should move.
- They help the director plan each shot’s pacing and energy.
- They prevent confusion by clarifying what happens in each frame.
3. Dialogue/Voiceover
Dialogue or voiceover notes include lines from the script that match each frame.
These can be:
- Spoken dialogue between characters (For example: “We have to leave now!”)
- Narration or voiceover (For example: “It was a cold winter night..”)
Why Is This Important?
- It helps sync visuals with audio in movies, animations, and ads.
- Writers and directors can ensure the dialogue flows naturally with the visuals.
- It provides actors and voice artists with an understanding of the scene’s tone.
4. Camera Directions
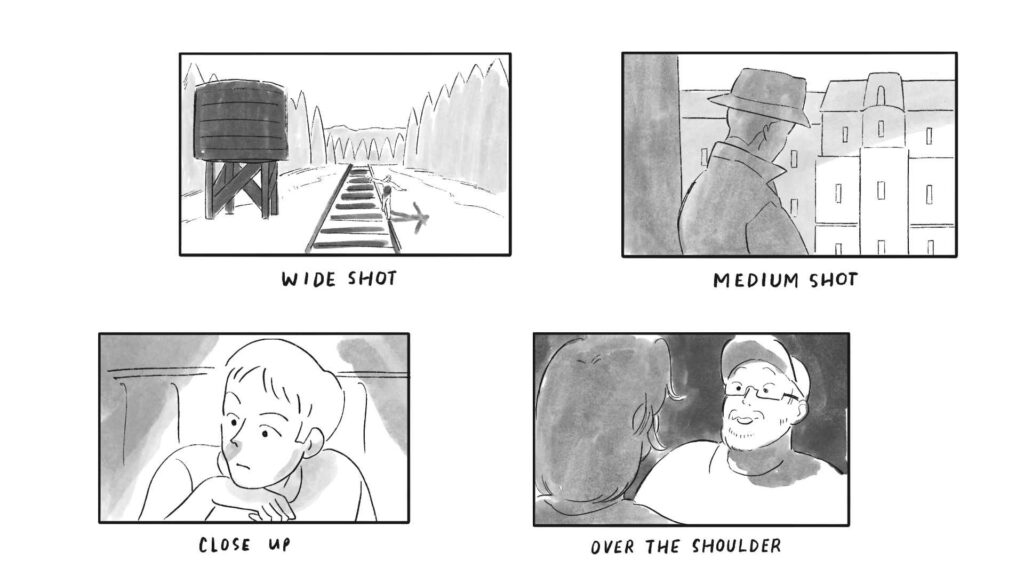
Camera directions indicate how a scene should be shot.
They include:
- Camera Angles (Close-up, wide shot, over-the-shoulder)
- Camera Movements (Pan, tilt, zoom)
- Transitions (Fade-in, cut, dissolve)
Why Are Camera Directions Important?
- They help cinematographers and animators visualize the storytelling style.
- They ensure smooth transitions between scenes.
- They add emotional depth by choosing the right angle for each moment.
For example:
- Close-up: Shows a character’s emotions intensely.
- Wide shot: Establishes the setting and context.
- Tracking shot: Follows a character’s movement for a rhythmic feel.
Step-by-Step Guide to Creating a Storyboard
Here comes the fun part!

[Source: GIF Tenor]
Creating a storyboard is an essential part of the creative process. So, when making a film, animation, or marketing campaign, get into storyboarding.
Here’s a step-by-step guide to help you bring your ideas to life!
Step 1: Conceptualize Your Story
Before sketching, take a moment to define your story’s core idea:
- What will be your main message or narrative?
- Who are going to be your key characters?
- What emotions or actions do you want to capture?
👉 Tip: Write a brief outline of your story to guide the structure of your storyboard.
Step 2: Choose Your Medium
There are two main ways to create a storyboard:
Digital Tools
If you prefer a polished look, use storyboarding software like:
- Storyboard That (Beginner-friendly with drag-and-drop features)
- Toon Boom Storyboard Pro (Great for professional animation)
- Adobe Photoshop or Illustrator (For detailed custom storyboards)
Traditional Methods
Prefer a hands-on approach? Use:
- Blank paper or a storyboard template
- Sticky notes (Great for rearranging scenes easily)
- Whiteboards (For quick brainstorming and changes)
👉 Tip: Storyboarding is super easy and doesn’t need any fancy gear—just grab a pencil and your imagination!
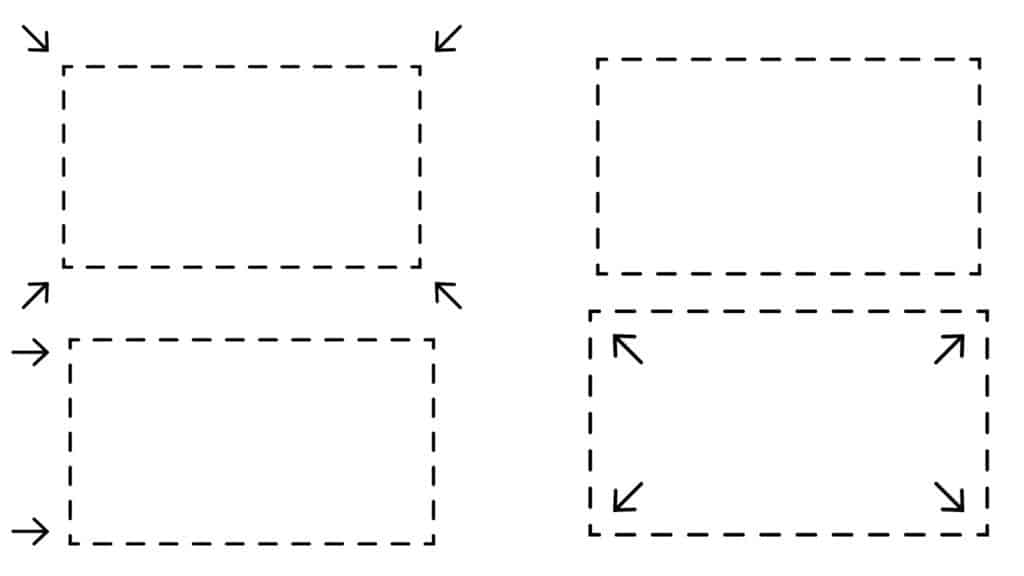
Step 3: Sketch Your Frames
Now, it’s time to draw each scene!
But don’t worry—you don’t have to be an artist. Stick figures work just fine!
- Focus on composition and movement rather than perfect artwork.
- Include arrows to show motion ( a character running).
- Use simple backgrounds to set the scene without clutter.
[Source: Reddit]
👉 Tip: If drawing isn’t your thing, try using photos or digital mockups instead!
Step 4: Add Detailed Annotations
A great storyboard has every bit of detail to guide the production team.
These include:
- Action Notes to describe movements and key moments
- Dialogue/Voiceover for script lines or narration.
- Camera Directions to capture angles, zooms, or transitions
👉 Tip: Keep descriptions clear and concise—too much detail can clutter the page!
Step 5: Review and Revise
Storyboarding is an iterative process, meaning you’ll need to refine it based on feedback.
- Show your storyboard to team members or friends.
- Look for areas where story flow or clarity can improve.
- Make necessary adjustments before moving forward with production.
👉 Tip: Don’t stress about making changes! A storyboard is very flexible and can help you nail down your ideas before you start filming or designing.
Relatable Reads: Top 20 Animation Styles (With Influencing Examples) – LocalEyes
Storyboarding for Specific Mediums
Storyboarding isn’t a one-size-fits-all process. It changes depending on the medium you’re working with. For each medium, the storyboard works differently.
1. Storyboarding for Animation
Unlike static mediums, animation relies heavily on timing, movement, and transitions.
A good animation storyboard includes:
- Keyframes: Important poses or moments that define an action.
- Motion Arrows: Indicate character or object movements.
- Timing Notes: Specify how long an action lasts.
- Scene Transitions: Cuts, fades, or camera pans to maintain fluidity.
Example: Animated Storyboard Scene
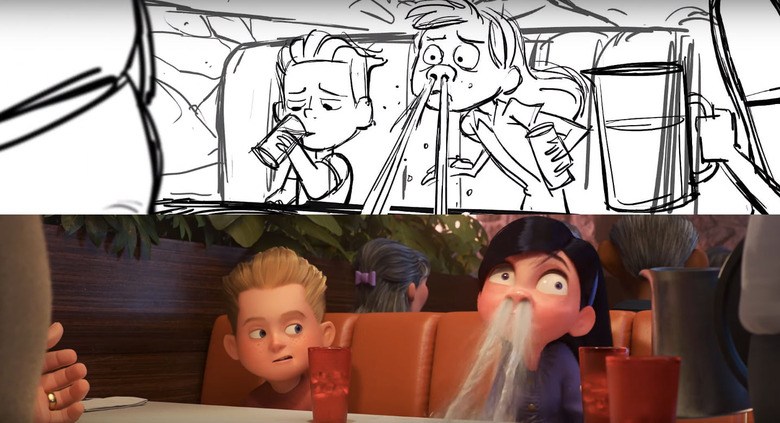
[Source: The Morning Watch: ‘Incredibles 2’ Storyboard Comparison|SlashFilm]
👉 Tip: Use frame-by-frame sketches to map out character expressions and key movements.
2. Storyboarding for Novels
Even though novels are text-based, storyboarding can help authors structure their plot and develop character arcs visually.
Think of it like a roadmap for your story!
How to Storyboard a Novel
- Divide the story into major plot points. (Beginning, Middle, End)
- Use index cards or a visual chart to map out key events.
- Include character development arcs. (Where does the character start vs. end?)
- Break down chapters into smaller scenes to ensure pacing works.
Example Breakdown:
- Scene 1: Introduction (Character meets their challenge)
- Scene 2: Rising Action (Conflict intensifies)
- Scene 3: Climax (The moment of greatest tension)
- Scene 4: Resolution (How things wrap up)
👉 Tip: If you like visuals, go for simple sketches to show scenes, kind of like a comic strip!
3. Storyboarding for Short Films
Short films must tell a complete story in a limited timeframe. Here, every shot counts. A well-structured storyboard removes unnecessary scenes.
Key Elements of a Short Film Storyboard
- Each frame should move the story forward.
- Use a variety of close-ups, medium shots, and wide shots to convey emotions and actions.
- Storyboards help plan seamless cuts and visual continuity.
Example:
- Scene 1: Wide shot of the protagonist entering a room.
- Scene 2: Close-up of nervous expression.
- Scene 3: Over-the-shoulder shot revealing a shocking discovery.
👉 Tip: Short films really shine with good visual storytelling. Use cool shots to show what’s going on instead of talking too much!
Check out How to Write a Script for a Short Film? – Step By Step Guide – LocalEyes
4. Storyboarding for Video Production

[Source: GIF Tenor]
Corporate, marketing, and online content videos must be clear, engaging, and purposeful.
Storyboarding helps businesses:
- Plan content flow
- Ensure brand consistency
- Grab attention in the first few seconds
How to Storyboard a Marketing Video
- Frame 1: Logo animation with engaging intro text.
- Frame 2: Presenter speaking with on-screen graphics.
- Frame 3: Cutaway shots of product demonstrations.
- Frame 4: Call-to-action (Website URL, offer, or next steps).
👉 Tip: Make marketing storyboards to the point. Just concentrate on clear messaging and connecting with your audience.
Tools and Resources
Using the right tools makes it 100 times easier to storyboard process efficiently. Here’s a list of templates, software, and free resources to help you get started!
Storyboard Templates
Different projects require different types of storyboards.
Here are some templates for various mediums:
- Basic Storyboard Template (Ideal for beginners)
- Film & Animation Storyboard Template (Includes space for action notes and camera angles)
- Novel & Writing Storyboard Template (Focuses on plot structure and character arcs)
- Marketing Video Storyboard Template (Designed for ads and explainer videos)
Software Recommendations for Storyboarding
If you are into digital tools over paper, here are some easy-to-use programs for storyboarding:
1. PowerPoint
PowerPoint is a great tool for beginners. You can easily create slides as storyboard frames.
How to Create a Storyboard in PowerPoint:
- Open PowerPoint and create a new blank presentation.
- Insert a table or multiple rectangles to divide slides into frames.
- Use images, stick figure drawings, or text to illustrate scenes.
- Add captions for action notes, dialogue, and camera directions.
- Save the file as a PDF or print it for collaboration.
2. Canva
Canva offers pre-made storyboard templates. You can just drag and drop for a polished look.
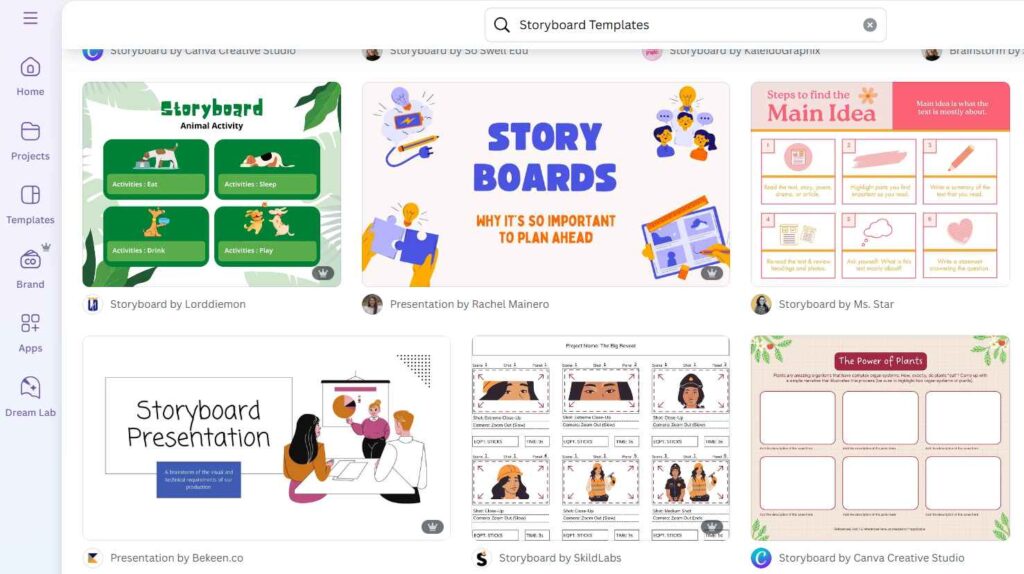
[Source: Canva]
How to Create a Storyboard in Canva:
- Sign up on Canva.com (Free & Paid versions available).
- Search for “Storyboard Templates” in the template library.
- Choose a template and customize it by adding images, icons, or text.
- Save your work as a PDF or PNG, or share it online.
Free Resources for Storyboarding
If you’re on a budget, here are some free platforms to create professional storyboards:
Free Online Storyboarding Tools:
- Storyboard That: Easy-to-use, drag-and-drop storyboard creator.
- Boards: Free version available for digital storyboarding.
- Shot Designer: Helps with scene planning and shot composition.
Free Drawing Tools for Storyboarding:
- Krita: Free, open-source drawing software.
- GIMP: Free alternative to Photoshop for detailed storyboarding.
Tips for Effective Storyboarding
You don’t need to have artistic skills to start with. Storyboarding is all about communicating ideas clearly. If you manage to do that, you are all set.
1. Simplify Your Drawings
- Try to learn perfect sketches
- Basic stick figures to represent characters
- Start with simple shapes like circles for heads or rectangles for bodies to outline the scene.
- Arrow to show movement or camera direction.
2. Focus on Clarity
- Keep frames simple; only the key details
- Use labels or captions to explain what’s going on in each scene
- Make sure the action sequence, camera movement, and dialogues are easy to understand.
3. Be Flexible
- Rearranging scenes for better flow
- Tweaking camera angles or action sequences based on feedback
- Cutting unnecessary frames to improve pacing
Common Mistakes to Avoid
It is alright to make mistakes here and there. That’s how you will learn. Even experienced creators make storyboarding mistakes. Here are two big ones to watch out for:
| Mistake | Solution |
| Overcomplicating Frames | Focus on key actions and expression. Too many details are hard to read, so leave out unnecessary background details. |
| Neglecting Annotations | Always add brief and clear descriptions under each frame. |
Frequently Asked Questions
How to make a storyboard step by step for beginners?
What are the 7 steps in storyboarding?
How to make a storyboard in Canva?
How to make a storyboard without drawing?

Executive Producer at LocalEyes Video Production | Emmy Award Winning Producer