Drone shots don’t just sell homes, they sell the lifestyles orbiting them.
Think about it.
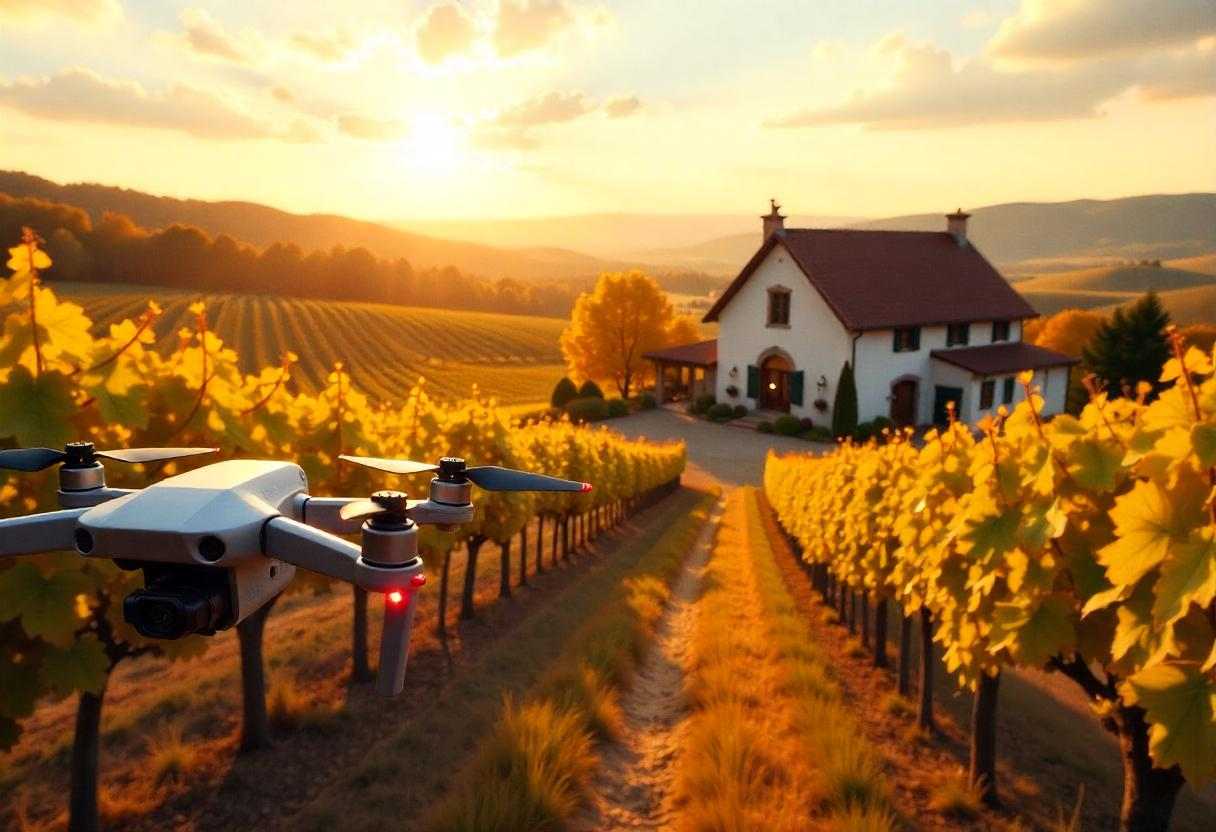
An aerial view of the sunshine hitting the green garden, the way the driveway curves, and even how close that pizza place is!
This is where drones come in. Such flying cameras take real estate videos to a legit 400ft level up.
They show off the full vibe of the property from above.
Also, it’s way effective than simple walkthrough content nowadays.
Here’s the kicker-
- “Listings with drone content sell 68% faster,” according to MLS statistics.
So, it’s time to make the most of that device. So, how to roll with drone video?
- Fly high, but smooth and steady
- Capture wide shots and slow pans
- Focus on key features and colorful areas like the garden
- Shoot during golden hours
- Edit with music and voice-overs
Try these steps and enjoy seeing your For Sale sign turn into a Sold sign.
For high-quality videos for the Real Estate business, contact LocalEyes today!
What Are the Legal Requirements for Using Drones in Real Estate?
Want to fly your drone for business purposes?
First, explore the legal framework for using it. That way, you can protect yourself from fines and legal issues.
Federal Aviation Regulations
The Federal Aviation Administration controls all drone flights in the US.
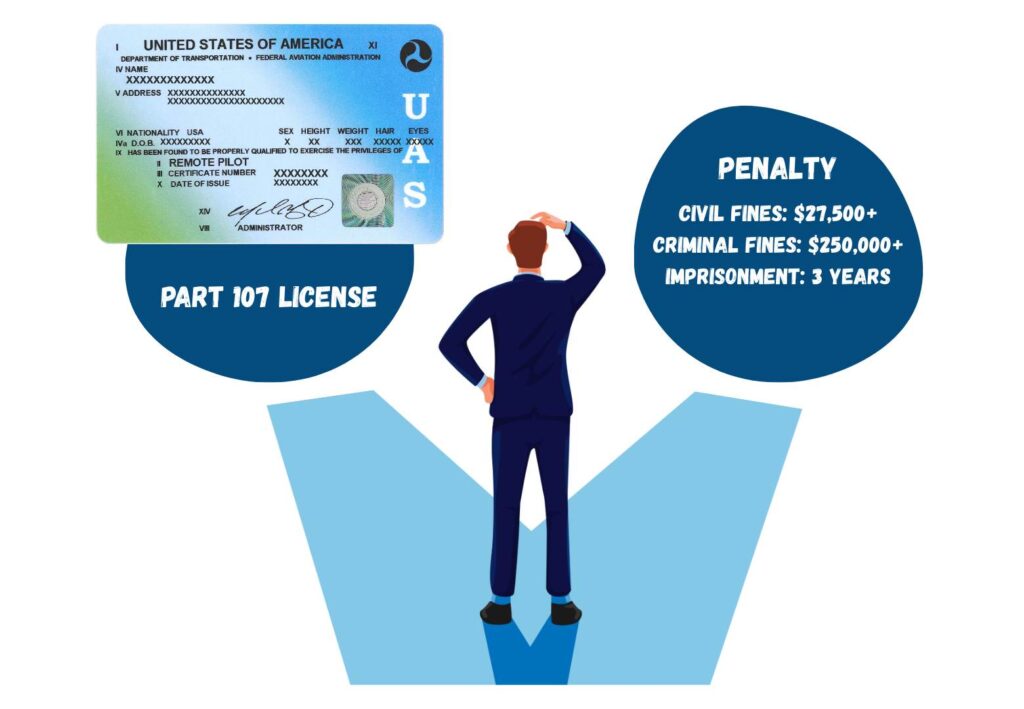
If you’d like to use a drone for business like real estate, get a Part 107 Certification.
Such a certificate proves that you know how to fly the device safely. Plus, it ensures you follow the laws that govern aerial operations.
Without the certificate, flying drones can get you a hefty penalty. This includes-
- Fines over $27,500 for civil
- Criminal penalties reaching $250,000+
- Imprisonment for up to 3 years
[Source: Colorado State University]
Local Laws and Privacy Considerations
Surely, you have to check FAA regulations. Also, go through your local laws for any extra restrictions.
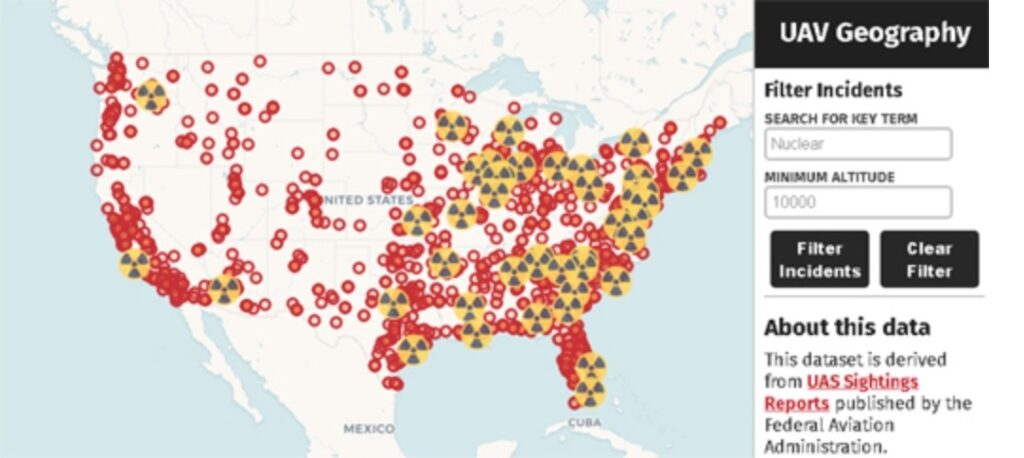
[Source: Maps Mania]
Some places may have no-fly zones. Some prohibited areas are the ones around-
- White House
- Camp David
- Military bases and
- Nuclear facilities
The drone laws vary by state. For instance,
6 states banned drones from flying over properties like prisons and railroad areas. 3 states have also passed laws to protect people’s privacy from drones.
You may also need special permission to fly over schools, hospitals, and certain buildings.
Privacy is a big issue. You shouldn’t use your drones over someone’s property without their permission, especially if you’re filming.
So, always ask the property owners or residents if you can take a video through the device.
[Source: NCSL | Current Unmanned Aircraft State Law Landscape]
How to Choose the Right Drone for Real Estate Videography?
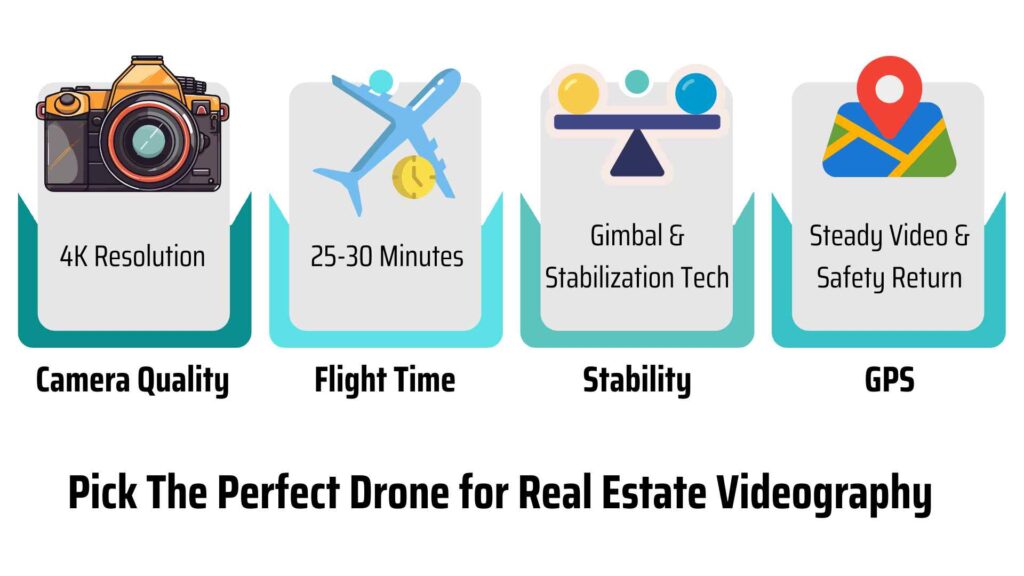
Camera Quality
The main player.
Look for a drone that can shoot in at least 4K resolution. This ensures clarity. You get the most detailed and crispiest shots of the property no matter how high the drone flies.
High resolution means the footage will look sharp and rich on bigger screens. This is important for selling.
As per Wyzowl stats,
“91% of consumers say video quality influences their trust in brands.”
So, focus on camera quality for drone videography.
Ensure it has at least a 48MP camera and shoots 4K video at 60fps.
Flight Time
Make the most of your drone.
The amount of time the device flies in the air matters.
Longer flight times mean more opportunities to capture different shots. For this, you need a solid battery for the drone and a backup.
- Most consumer drones give you 15 to 30 minutes of flight time. The smaller ones offer 10 to 20 minutes while the high-end ones can go up to 2 hours.
Don’t want to be spendy? Go for 20 to 30 minutes per battery. This is a decent flight time. And you get longer-duration footage without breaks.
If the batteries die, the backup will help you. This is more handy for filming larger properties or multiple locations in one day.
The backup will also help you avoid interruptions.
Flight Stability
Shaky footage is an enemy of the real estate business.
Culprits behind them?
- Sensor issues
- Environmental conditions
- Mechanical problems
- Improper calibration
They can ruin the best shots. This can lead to bad content and unwanted consequences, like loss.
Want to create smooth videos? Prioritize drone selection. Look for a device with advanced stabilization features.
Get a gimbal. It keeps the camera steady as it flies over land and properties. Plus, the tech helps you produce cinematic footage that shows the property beautifully.
You can try the DJI Phantom 4 Pro. It has a FlightAutonomy system that ensures-
- Obstacle avoidance and
- Enhanced flight stability
Check this out: How to Activate DJI Phantom 4 Pro V2.0
Also, if you’re new, keep practicing. It’s common for beginners to experience unstable flight. Don’t worry.
Keep practicing and improve your control and stability.
GPS Capacities
A friend who helps drones fly smart and safe.
GPS is an advanced technology that gives your drone a sense of direction. It’s just like maps for people. The tech tells the device where it is, where to go, and how to stay still in the air.
This helps you make clean and steady property videos.
In real estate, videos must show homes clearly. GPS helps the drone hover in one spot so it captures perfect angles.
Moreover, GPS-enabled drones can give you consistent and precise location data.
This is important because accurate GPS helps show the exact location of properties. It can highlight nearby-
- Parks
- Schools
- Attractions
This makes the videos more interesting and helpful for buyers.
GPS also adds safety. If the battery gets low or the signal is lost, it commands the drone to return home on its own.
Such a feature reduces crashes and saves money and time.
How to Prepare a Property for Drone Videography?

Staging The Property
Landscaping
The yard is one of the first things potential buyers will check out. So, it must look fine. For this-
- Mow the lawn
- Trim shrubs
- Plant flowers
A well-maintained garden can enhance the property’s visual appeal.
Remove Vehicles
The vehicles parked in the driveway or front yard block all the beauty of a home. This can distract buyers.
So, clear the space to maintain focus on each aspect of the property. Get the clean shots.
If it’s not possible to move all the vehicles, try this out:
- Fly drones during low traffic times
- Choose angles that avoid vehicles
- Use elevation to bypass them
Decluttering
Just like indoor staging, decluttering outdoor spaces is important as well.
Remove all the unnecessary items. It includes-
- Trash
- Cans
- Garden tools
- Children toys
A clean environment and space make the property look more inviting.
Highlight Unique Features
If the real estate property has unique features, highlight them.
It can be a poor or patio. Show them well.
Turn on outdoor lights. Set up furniture and make it look nice.
Choosing The Right Time
Know when to fly your drone over the property.
Try to get natural shots. You get the most picturesque shot of your land.
Typically, the best time of the day for optimal lighting is the “golden hour.”
This means-
- The first hour after sunrise
- The last hour of light before sunset
This produces a soft, natural light that reduces harsh shadows while giving a warm tone to the footage.
Use a sun-tracking app (like Sun Seeker). It helps you see where the sun will be at any time. Ensure you plan your shots based on light direction and the mood you want.
Reddit Experts also suggest avoiding high noon. This can result in harsh light and drone shadows, which can ruin the shot.
What Are the Best Camera Settings for Real Estate Drone Videos?
Once your drone is ready to fly, time to get the camera settings right. This will help enhance the video quality of the real estate business.
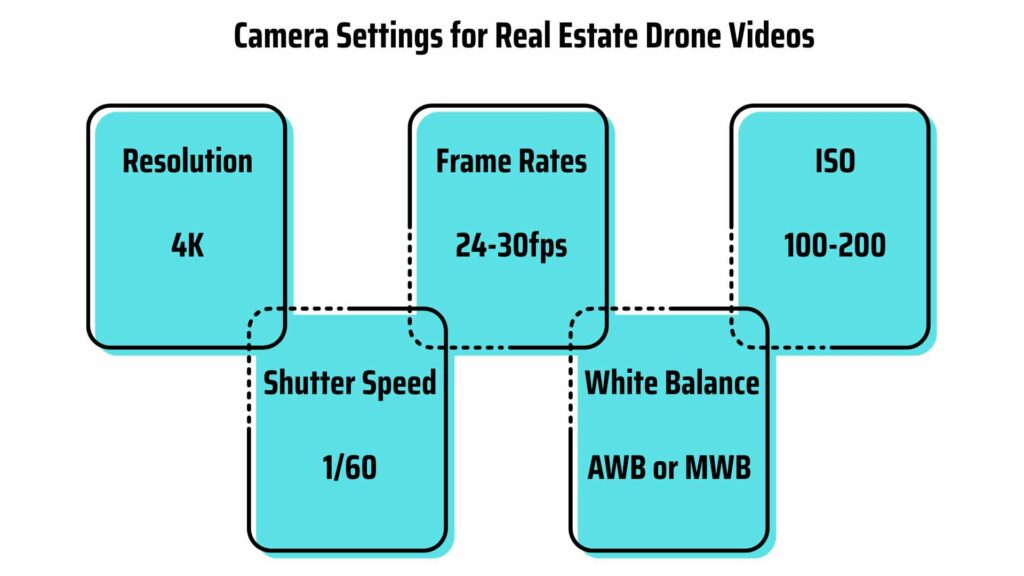
Resolution
The higher, the better.
A 4K resolution works best when it comes to the camera settings. This captures crisp details and allows video editors to crop the footage without losing quality.
You can also try other options. Just identify the purpose and then pick accordingly.
For example,
| Resolution | Altitude | Best for |
| 4K | High 100-250m | Wide shots of large properties and landscapes |
| 2K | Medium 50-100m | Properties in their surroundings with good detail |
| Full HD | Low 30-50m | Highlighting features like pools, gardens, and the neighborhood |
[Source: GoodVission | Requirements for Drone Camera Video Processing]
Frame Rates
A frame rate of 24 to 60fps is pretty common for drone footage.
- 24fps: Cinematic, smooth motion. It’s ideal for slow, artistic shots like sweeping landscapes.
- 30fps: Sharper for panning or movement. Ideal for general tours, indoor or outdoor.
- 60fps: Ensure smooth, detailed footage. Best for fast movement like drone fly-throughs or slow motion effects.
Real estate pick: 30fps for most shots, 24fps for a film-like feel, and 60fps for slowing down clips.
ISO
A camera setting that brightens or darkens the footage.
When filming real estate exteriors, you often work with natural sunlight. On bright days, keep your ISO low. Around 100 to 200.
This ensures that the colors of the house, landscaping, and sky appear clear and vibrant. Plus, it lowers grain or noise in images.
For interior shots, lighting may be weaker.
`So, you may need to increase the ISO to 400 or 800. However, using drones indoors is less common.
So use it only when needed.
Shutter Speed
For real estate, a smooth look is the winning key.
Let’s say you shoot at 30fps. In that case, set your shutter speed to about 1/60 seconds.
This setting works well for slow, sweeping shots of the real estate properties, like-
- Moving through the living room
- Panning around the background
Such a setting creates a more cinematic feel.
Avoid faster shutter speeds like 1/250. This can make the footage look jittery, which isn’t inviting.
White Balance
White balance keeps colors true to life.
This helps homes look clean, bright, and welcoming. However, you must adjust it correctly depending on the situation. For example-
Auto White Balance: Easy to use. Works fine in even outdoor lights. However, if there’s both sun and shade, the colors may shift.
Manual White Balance: Gives better control. Use a white card to set it. Helps show the true colors of the home’s exterior.
More Kelvin Settings
- Daylight 5600K+: Best for sunny days. Makes real estate videos look fresh and natural.
- Shade 7000K+: Warms up shady areas like porches or patios.
- Tungsten 3200+: Not often used outdoors.
How to Plan Effective Flight Paths for Capturing Real Estate?
Step 1: Scout The Property
Start the flight planning by visiting the real estate location first. Identify key features like the:
- The front and back parts of the building
- Gardens
- Pools
- Unique architectural elements
Take notes on the best angles.
Step 2: Map Your Flight Route
Chart out routes that highlight the most standout property features. Use mapping software or a flight planning app for that.
Try to capture the front view first. Then, the side and aerial views.
It should be like storytelling.
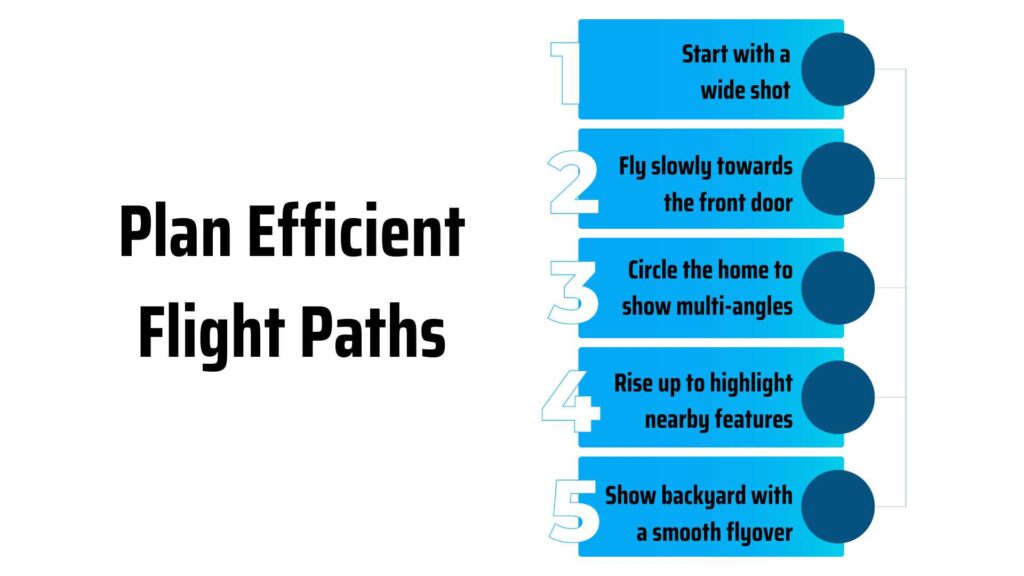
For instance,
- Start with a wide shot of the entire property
- Fly toward the front door slowly (pull-in shot)
- Circle the home to show different angles
- Rise up to highlight nearby features like parks, lakes, or schools
- Show the backyard with a smooth flyover
Step 3: Plan Smooth Transitions
Design your flight path. Include-
- Gradual ascents
- Descents and
- Horizontal movements
Avoid abrupt changes. Ensure stable, professional, and smooth shots.
Step 4: Check Review Regulations
Familiarize yourself with local laws and restrictions. This will help you ensure compliance during the shoot.
Step 5: Conduct Test Flights
Run a few test flights to refine the route. Adjust if there’s any obstacle and ensure the movements are fluid.
What Are the Best Practices for Shooting Real Estate Drone Videos?
Use Natural Lighting
Try to shoot during the golden hours. That way, you get the most gorgeous, soft light.
However, consider weather conditions as well, since this can affect the footage.
Avoid shooting during midday or high noon. The sunlight will be harsh.
Experiment With Angles and Altitudes
Use different angles and altitudes to make your real estate footage visually interesting.
For instance-
High Aerial Angles: Start with wide shots from above to give viewers an overall layout of the property.
Low Flying Shots: Move the drone closer to the ground. Emphasize elements like gardens, pools, or pathways.
Tilted Angles: Change the tilt of the camera when flying drones. It can create dynamic compositions.
Create A Story
Your real estate marketing video should tell a story.
Start with an overview of the area. Then, transition to the exterior of the property. Next, the interior tour.
It’s quite a logical progression and keeps viewers engaged. Not just that. It gives them a feel for the home.
How to Edit and Enhance Drone Footage for Real Estate Listings?
Video Editing Software
- Adobe Premiere Pro: A professional-grade software with extensive features. Great for beginners.
- Final Cut Pro: A choice for Mac users. It offers a user-friendly interface and powerful editing tools.
- DaVinci Resolve: Known for its advanced color correction capacities. It helps enhance the visual appeal of the drone footage.
Enhancement Techniques
Color Correction
Adjust the brightness, contrast, and saturation first to correct any lighting issues. This gives your footage a polished look.
Use color grading to set the mood.
Remember-
- Warmer tones can create a cozy vibe
- Cooler tones may seem more sleek
Footage Stabilization
It’s super helpful for shaky footage.
The setting helps smooth out any jerky movements so you have more pro-looking footage.
Adding Music or Voiceover
Music can set the tone and stir emotions.
Choose background tracks that match the vibe of the real estate property.
If necessary, add voiceover. This will walk viewers through the property features.
Ensure the voice is positive and clear. It can help keep the audience engaged as they watch the video.
How to Integrate Drone Videos into Real Estate Video Marketing Strategies?
Embed In The Online Listings
Embed your drone video in online property listings. Try websites like Zillow and Realtor, as they allow multimedia content.
Post On Your Website
Add to the property’s dedicated page.
Share On Social Media
Post the video on different platforms like Facebook, Instagram, YouTube, and TikTok.
Email Campaigns
Include a short teaser and link to the full video.
Virtual Tours
Combine drone footage with interior shots and create virtual tours.
This gives potential buyers a complete view of the property from their homes. Ensure it’s 360 degrees.
What Are the Common Challenges in Real Estate Drone Videography and How to Overcome Them?
| Challenge | Consquence | Solution |
| Unpredictable/Harsh Weather Conditions | Affect Visibility and Drone Stability | Always check the forecast before flying. If conditions are poor, wait for better weather. |
| No-Fly Zones | Limited Shooting Locations | Use maps or drone apps to identify no-fly zones. Ensure compliance and safety. |
| Technical Issues (Flying Near Tall Buildings or Crowded Areas) | Signal Loss or Weak Connectivity | Fly in open areas away from tall structures. Reduce signal issues. |
| Battery Limitations | Premature Landings or Drone Getting Lost | Monitor battery levels closely. Land early to avoid losing the drone. |
How to Stay Updated with Evolving Drone Technologies and Regulations?
- Take courses. Many online platforms like DroneU offer updates for Part 107.
- Join webinars or workshops. DJI and others often hold events.
- Follow FAA updates. Visit their website for news.
- Subscribe to drone YouTube channels. Easy way to learn.
- Read forums. Try Reddit or DJI forums, as they’re great for real-world tips.
New rules can affect where and how you fly. New gear can improve your work. So, keep learning.
Staying updated can help you stay safe and sharp.
FAQs: Drone Video Production For Real Estate
Can you fly drones over private property?
Is drone photography worth it in real estate?
Can I use a drone without a license for my own listing?
How long does a typical shoot take?

Executive Producer at LocalEyes Video Production | Emmy Award Winning Producer