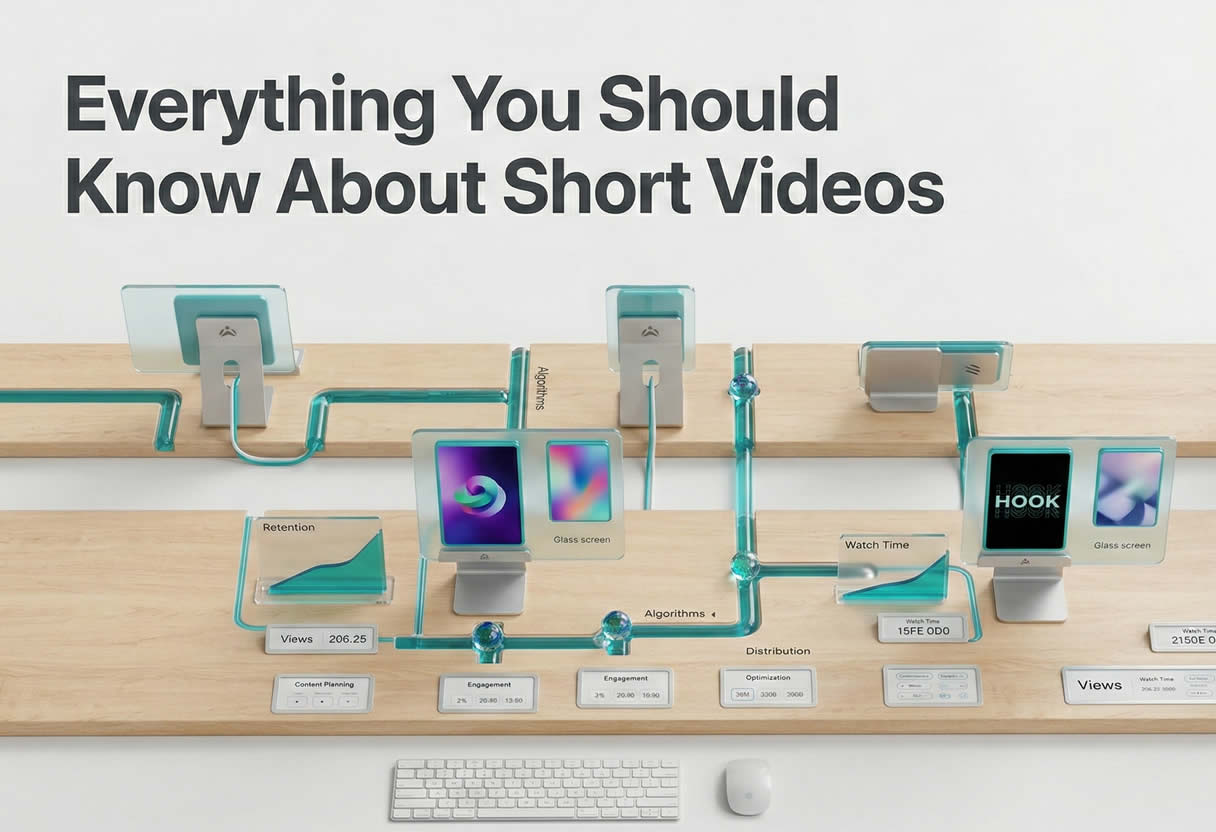
Ever wish you had eyes everywhere on set?
That’s exactly what multi-camera does. It shoots the action from multiple angles without yelling “Cut!” a hundred times.
But here’s the thing: more cameras equals more complexity. Coordinating multiple cameras can get tricky quickly if you’re not prepared.
This is why we have got you 10 essential multi-camera techniques. It will take your shoots from chaotic to cinematic in no time.
| 1. Plan with shot lists & storyboards. 2. Match cameras, lenses & gear. 3. Follow the 180-degree rule. 4. Add movement with dollies & cranes. 5. Light evenly from all angles. | 6. Use boom + lav mics for clean audio. 7. Sync cameras via timecode or claps. 8. Monitor with multi-view setups. 9. Cut smoothly & keep continuity. 10. Color match all camera feeds. |
You can check out the Ultimate Pre-Production Checklist for Film & Video – LocalEyes.
Why Is Pre-Production Planning Crucial for Multi-Camera Shoots?
Pre-production planning is like setting the stage before the curtain rises. It ensures the smoothness of the multi-camera shoot from start to finish.
Even small missteps can lead to chaos when several cameras are rolling at once. That’s why it’s important to plan things out ahead of time.
Here’s why pre-production is your best friend on a multi-camera shoot:
1. Shot List Planning
Think of a shot list as your shoot’s roadmap. It lays out exactly what needs to be captured and from which angles.
- Ensures nothing gets missed
- Helps organize time and resources
- Guides each camera operator on where to focus
A planned shot list helps avoid overlap and confusion as multiple cameras capture different angles.
2. Storyboarding
Storyboarding is like giving your crew a sneak peek at the final product. You don’t have to be Picasso. Just simple sketches or visual references will do!
- Helps visualize the flow of scenes
- Allows directors and DPs to plan camera placement
- Saves time on set by reducing guesswork
This is especially helpful when switching between wide shots, close-ups, and reaction shots in real time.
3. Camera Assignments
Assigning specific roles to each camera helps avoid chaos during the shoot.
- Camera A: Wide master shot
- Camera B: Close-up on character 1
- Camera C: Reaction shots or B-roll
This structure helps everyone know their job and avoid duplicate footage or missed moments.
Why Does It All Matter?
When you walk into a multi-camera shoot with a solid plan, you’re setting yourself up for:
- Fewer retakes
- Faster editing
- Better storytelling
- A happier, less stressed crew
How Do You Choose the Right Equipment for Multi-Camera Setups?
The right equipment for a multi-camera setup can make or break your production.
You won’t just randomly pick the fanciest gear. You will go for the one that works smoothly to capture consistency.
1. Different Camera Types
For multi-camera shoots, use matching or similar cameras.
Why?
Different models usually produce slightly different colors, frame rates, or image styles. It can make post-production a nightmare.
Popular choices:
DSLRs/Mirrorless:
- Great for interviews, documentaries, or smaller setups.
- Good image quality
- May need external recorders for longer shoots.
Camcorders:
- Reliable for long-form recording
- Built-in XLR inputs
- Easy media management
Cinema Cameras:
- Best for high-end productions
- Incredible image quality
- More flexibility in post
- It can be pricey and complex
2. Lenses
Lens choice impacts framing, depth of field, and the overall feel of your footage. Consistency is all that matters in a multi-camera shoot.
- Prime lenses (fixed focal length): Sharper and better in low light, but less flexible.
- Zoom lenses: More versatile for dynamic shooting, especially if you’re switching between wide and tight shots.
Things to consider:
- Use lenses with similar apertures and focal lengths across cameras.
- Avoid mixing wide-angle with telephoto unless it’s a creative choice.
3. Camera synchronization
Syncing footage from multiple cameras is where many productions stumble. It won’t happen if you plan ahead.
Options to sync footage:
- Timecode Generators:
Ensures all cameras (and audio devices) are perfectly in sync.
- Clapboard (Slate):
Clap once on camera and use the spike in the audio waveform to sync manually in post.
- Multi-camera recorders/switchers:
Useful for live-switching or recording synced footage in real-time.
- Audio sync via waveform:
It’s a good backup if you don’t have timecode, but it’s not always 100% accurate.
Relatable Reads: Film Clapperboard: Your Essential Tool for Professional Video Production – LocalEyes
What Are the Best Practices for Camera Placement?
Camera placement can make all the difference between a smooth, cinematic flow and a confusing mess.
Good placement doesn’t just make your shot look nice.
It helps tell your story clearly and keeps the audience oriented.
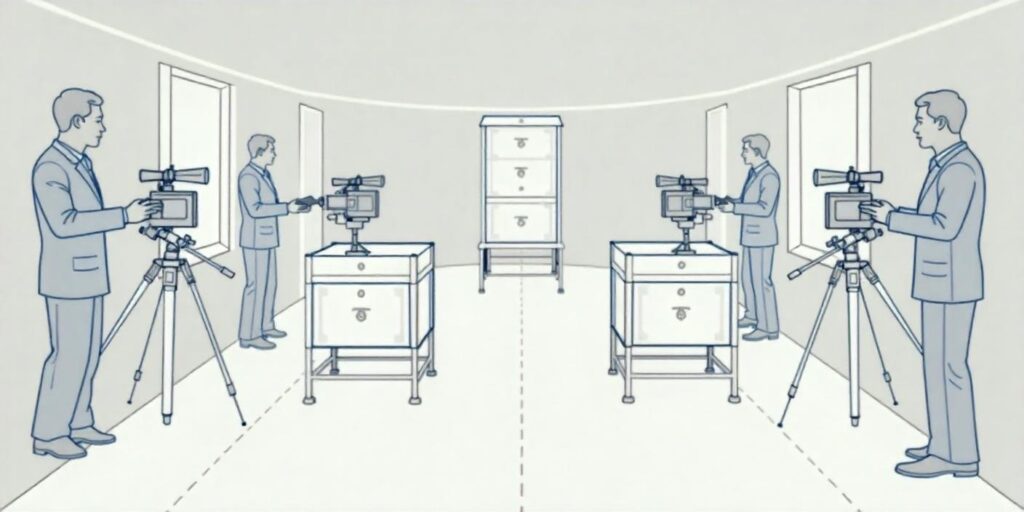
1. The 180-Degree Rule
The 180-degree rule is a classic filmmaking principle. It helps maintain spatial continuity between characters or subjects. Here’s the friendly version:
- Imagine a straight line (the “axis”) connecting your two main subjects.
- Now, draw an invisible 180-degree semicircle on one side of that line.
- All cameras should stay on the same side of that line.
2. Camera Positioning
Let’s look at how to place cameras for a few typical scenarios:
Interviews (Two-Person)
- Camera A: Wide shot of both people.
- Camera B: Close-up on person 1.
- Camera C: Close-up on person 2.
Panel Discussions or Roundtables
- One wide, static shot covers the entire table or group.
- Additional side angles or individual shots on each speaker.
- Place the cameras slightly staggered so they don’t appear in each other’s frames.
Action Scenes
- Camera A: Master wide shot (captures the whole scene).
- Camera B: Medium or over-the-shoulder shots.
- Camera C: Close-ups or inserts (hands, faces, weapons, etc.)
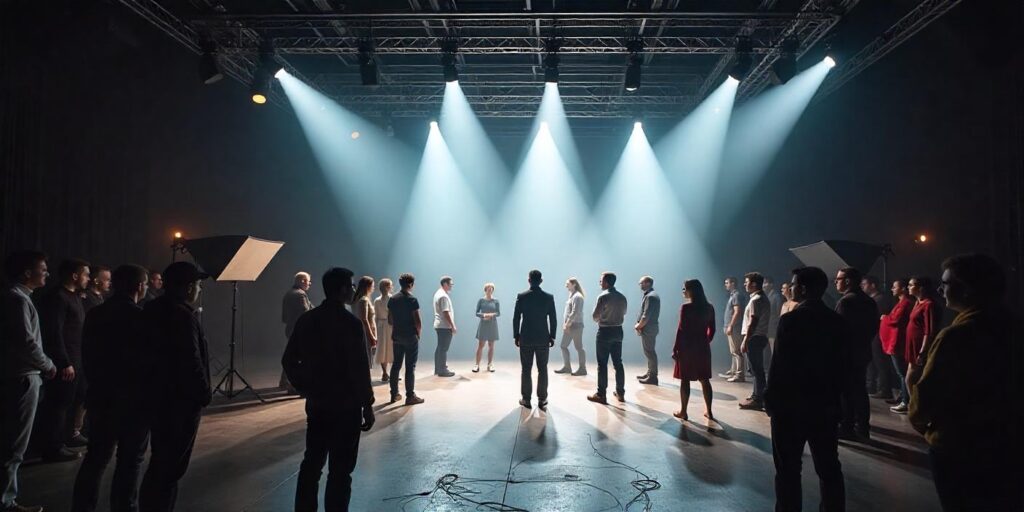
Live Performances or Events
- Camera A: Center wide shot (full stage).
- Camera B: Side angle (medium shots, movement tracking).
- Camera C: Crowd reactions or close-ups of performers.
How Can Dynamic Camera Movements Enhance Your Shoot?
Moving the camera lets your audience feel what’s happening instead of just “showing” it. So do that with your multi-camera gear.
1. Dollies
A dolly is basically a platform on wheels that lets the camera glide smoothly. It’s great for precise, controlled movement.
Common uses:
- Moves the camera closer to a subject
- Great for emotional moments or tension-building.
- Creates a feeling of distance or isolation.
- Follows a subject through a scene, keeping them focused
2. Cranes (or Jibs)
Cranes let you lift the camera up and move it in sweeping arcs. They’re great for big reveals, establishing shots, or dramatic conclusions.
Crane magic moments:
- Show a character in a large environment
- Great for epic storytelling
- Lower the camera to focus on a subject
- Create a sense of intimacy or isolation
- Add grandeur or tension in action sequences or performances
3. Handheld
Handheld shots add an element of chaos, realism, or intimacy. They bring the viewer into the scene, making them feel like they’re right there with the characters.
Where handheld shines:
- Makes the audience feel like a fly on the wall
- The slight shakiness mirrors a character’s inner turmoil
- Enhance urgency and energy
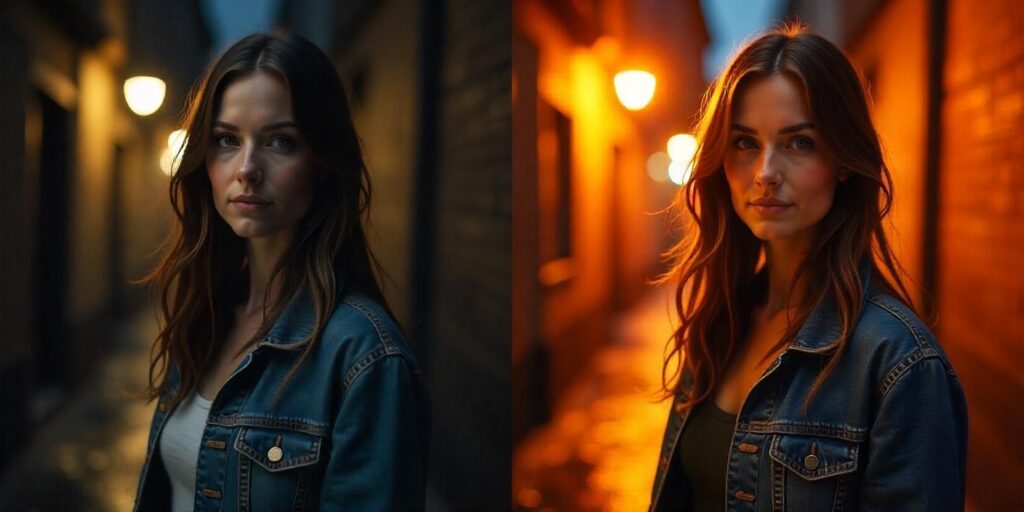
How Do You Manage Lighting for Multiple Cameras?
Getting the right lighting for one camera can be a real hassle. When you add more cameras to the mix, it gets even trickier. However, you can still try these methods to set the best lighting.
1. Use Soft Lighting
Soft lighting minimizes shadows, flatters faces, and is more forgiving across multiple angles.
How to do it:
- Use large softboxes or diffused LED panels as main lights.
- Place them at a flattering angle (usually 45 degrees off the subject).
- Add softer lights on the opposite side to reduce harsh shadows.
- Backlights separate subjects from the background and add depth.
2. Avoid Overly Dramatic Lighting
Strong directional lighting can look great on camera but might not be flattering from other angles. So, stick to a balanced, neutral setup, especially for interviews or talk shows.
Avoid deep shadows, harsh highlights, or strong contrast when working with multiple angles. But you can still do it if it’s a creative choice.
3. Keep Your Gear Out of Frame
- Use overhead rigging or ceiling mounts.
- Flag or barn-door your lights to control the spill
- Keep barn-door lights from shining into unwanted areas
- Do a quick test shoot from every camera angle
- Check for reflections, shadows, or visible lights
4. Light the Background
Don’t forget the background.
It should be lit in a way that supports the subject but doesn’t distract.
- Use practical lights (like lamps or LED strips) for natural ambiance
- Add subtle background lights to create depth
- Do not keep the focus away from the subject
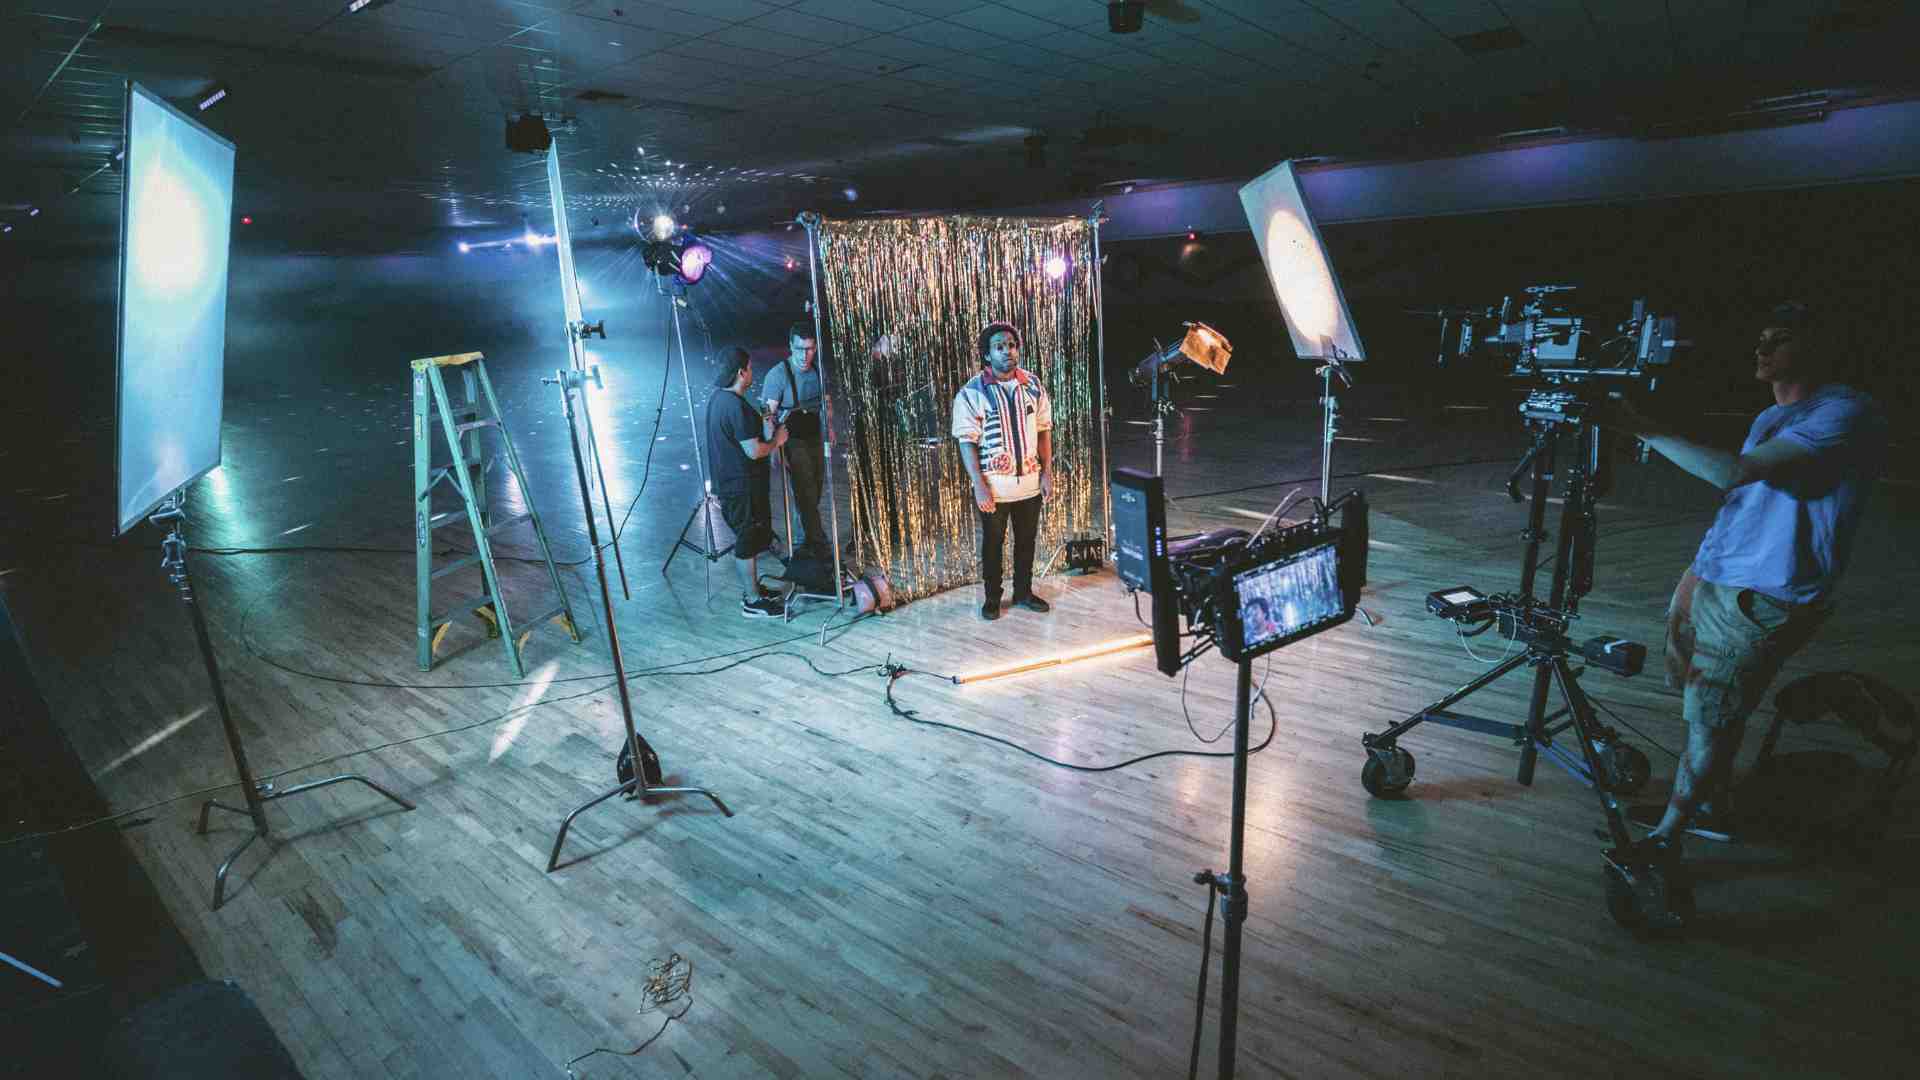
What Are Effective Audio Recording Techniques in Multi-Camera Shoots?
Setting the audio for multiple cameras needs to be done right. You don’t want to lose any of the recording just because you didn’t know the correct techniques.
1. Boom Mics
Boom mics (shotgun mics on boom poles) are great for capturing clean, directional audio without being in the shot.
Why they’re awesome:
- Pick up rich, full audio while staying out of frame
- Ideal for dialogues, interviews, or controlled environments
Best practices:
- Point the mic toward the speaker’s chest
- Do not put it in your mouth (to avoid popping)
- Keep it as close as possible without entering the frame
- Use a windshield (blimp) if you’re shooting outdoors
2. Lavalier Mics
Lavalier (or lapel) mics are small. These microphones are often hidden under clothing. They’re perfect for interviews, panel discussions, or anything with multiple speakers.
Why use a lavalier:
- Provide consistent audio as the subject moves
- Great backup to boom mics in case one fails
How to use them well:
- Hide the mic under clothing
- Use a softie to reduce rustling
- Use wireless lav systems for freedom of movement
- Test for clothing noise
3. Syncing Audio with Multiple Cameras
Getting great audio is one thing, but syncing it across all your footage is where the magic (and sometimes frustration) happens.
Here’s how to keep it simple:
1. Use Timecode Sync (Best Option)
- Perfectly aligns audio and video across devices
- Saves massive time in post
2. Use a Slate (Clapperboard)
- Works well if timecode isn’t available
- Use at the start of each take (and again after long breaks)
3. Sync via Audio Waveforms in Editing Software
- Good fallback method
- Best when you’re using both boom and lav mics
Check out Video Production Planning Checklist: 10 Essential Steps for Success
How Do You Synchronize Multiple Cameras Effectively?
This is how you can keep all the cameras in line without messing anything up.
1. Timecode Syncing
Timecode is like giving every camera and audio recorder a perfectly synced clock. They all record footage using the same time reference.
How it works:
- You attach timecode generators to each camera and audio recorder
- All devices record footage with matching timecode
- It is embedded in the metadata.
- Editing software recognizes this and syncs your clips automatically.
Why it’s great:
- Super accurate, even over long takes
- Ideal for professional shoots with multiple cameras and separate audio
- Saves tons of time in post-production
2. Clapperboards
The tried-and-true clap method is old-school. However, it is still totally effective, especially when you don’t have access to timecode gear.
How it works:
- At the beginning of a take, someone snaps a clapperboard
- Sharp audio spike shows up in every camera and audio waveform
- You line up the spikes in your editing software to sync manually
Why it works:
- Reliable and simple
- No extra tech required
- Works well for short or scripted shoots
3. Software-Based Syncing
If you didn’t use timecode or forget the clapper (we’ve all been there), modern editing software has your back.
Popular tools:
- Adobe Premiere Pro: Use the “Synchronize” option
- DaVinci Resolve: Automatic waveform sync in the Media Pool
- Final Cut Pro: Use “Synchronize Clips” for built-in audio matching
| Pros | Cons |
| → No extra gear needed → Great for smaller shoots or solo editors | → Not always 100% accurate → Can struggle with noisy environments or mismatched audio |
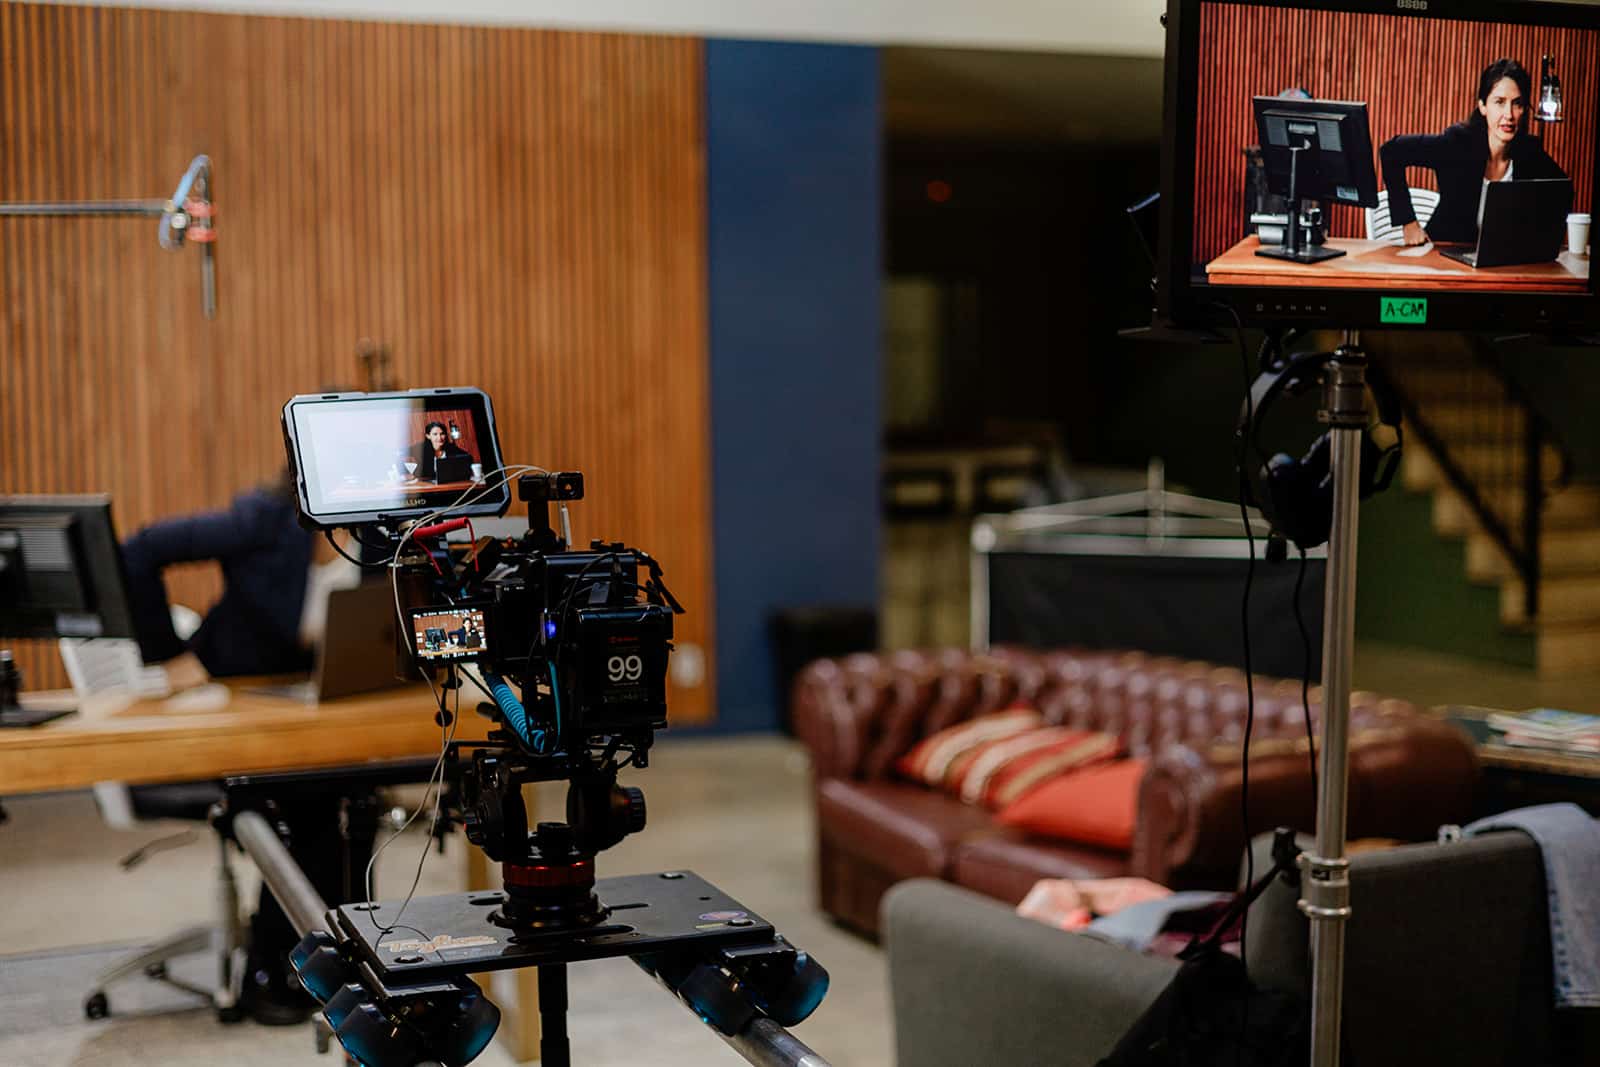
What Monitoring Tools Are Essential During a Multi-Camera Shoot?
During a multi-camera shoot, things can get chaotic fast! Different angles, different operators, different lighting, and one chance to get it right.
1. Multi-View Monitors
A multi-view monitor lets you see feeds from all your cameras on a single screen. Think of it as your control tower.
Why it’s a must-have:
- You can monitor framing, focus, exposure, and movement all at once
- Helps directors, DPs, and technical directors spot issues instantly
- Saves you from switching between separate screens
Features to look for:
- Customizable layouts
- Color/brightness consistency checks
- Tally lights or indicators for “live” cameras
2. Live Switching Equipment
Live switchers allow you to cut between cameras in real-time, especially helpful for:
- Live streaming
- Broadcast productions
- Concerts, events, and panel discussions
What they do:
- Let you switch between camera feeds live, with smooth transitions
- Add graphics, overlays, lower-thirds, and more in real-time
- Reduce post-production time if you’re happy with the live cuts
3. Wireless Monitoring
Wireless video transmitters can beam footage to directors or camera assistants without cables.
- Keeps the director mobile
- Helps camera ops get feedback on framing instantly
- Great for setups where tethering is limiting or dangerous
How Do You Approach Editing Multi-Camera Footage?
Here are some of the smoothest ways to edit the multi-camera footage with no time.
1. Sync All Your Footage First
You can’t edit anything until everything lines up properly.
Three common ways to sync multi-cam footage:
- Timecode syncing will automatically align the clips.
- Clapperboard/Slate syncing will line up each clip’s visual slate or audio spike to get perfect alignment.
- Audio Waveform syncing will use your editing software to auto-sync clips based on their scratch audio.
2. Create a Multicam Sequence
Most editing programs let you create a multicam timeline where you can switch angles in real-time.
How it helps:
- Speeds up editing
- You can watch in real-time and “cut” as you go
- Let you focus on flow first, polish later
3. Choosing the Best Angles
Your job isn’t just to cut randomly. It’s to tell the story visually. Here’s what to look out for:
- Choose close-ups when the moment is intimate or emotional
- In interviews or discussions, stay on whoever’s talking
- Use wider shots for transitions, setups, or action; tighter shots for detail
- Cut on action to make transitions feel natural
- Use cuts to maintain flow and build momentum
4. Maintain Visual Continuity
Continuity is a must when you’re switching between different camera angles.
Things to watch for:
- Make sure gestures and positioning match between cuts.
- Different cameras may have slightly different color profiles.
- Color-grade your angles to match so nothing looks out of place.
- Avoid switching between two very similar angles
What Are the Best Practices for Color Grading in Multi-Camera Projects?
Color grading multi-cam footage is all about consistency. You want every angle to look like it belongs in the same world.
1. Correct Before You Grade
- Start with color correction
- Match white balance, exposure, and contrast
- Use scopes (waveform, RGB parade) for accuracy
2. Match All Camera Feeds
- Focus on matching skin tones and background colors
- Pick one camera (usually A-cam) as your reference.
- Use color wheels or color match tools.
3. Group & Apply Grades Smartly
- Apply the same grade to all clips from the same camera
- Use adjustment layers, shared nodes, or source effects
4. Handle Lighting Shifts
- Grade different lighting setups separately
- Use keyframes or masks if the lighting changes mid-shot
5. Add Your Final Look Last
- Apply your creative grade (LUTs, cinematic look, etc.)
- Keep it subtle and consistent
What Equipment Is Essential for Multi-Camera Shooting?
Here is a table of equipment names and why you need them for multi-camera shoots.
| Equipments | Why Do You Need Them |
| Cameras and Support | → Two or more cameras with close image quality → Tripods or camera stabilization tools to reduce shakiness → Remote-controlled PTZ cameras for preset angles |
| Switching and Monitoring Equipment | → Video switcher or mixer to toggle between feeds seamlessly → Multiple monitors for previewing camera feeds → Headphones for monitoring audio quality |
| Connectivity and Cabling | → HDMI or SDI cables for camera to switcher connection |
| Audio Equipment | → External microphones for clear audio capture → Audio mixer to combine multiple audio inputs |
| Lighting | → Professional or budget lighting kits to balance and soften light → Reflectors or bounce boards to enhance natural or artificial lighting |
| Software and Post-Production | → Video editing software capable of multi-camera editing → Post-production tools for color grading, audio syncing, and effects |
Frequently Asked Questions
What is the multi-camera technique?
What are the 5 basic most common camera shots?
What is the 3 camera technique?
How to trigger multiple cameras at once?

Executive Producer at LocalEyes Video Production | Emmy Award Winning Producer