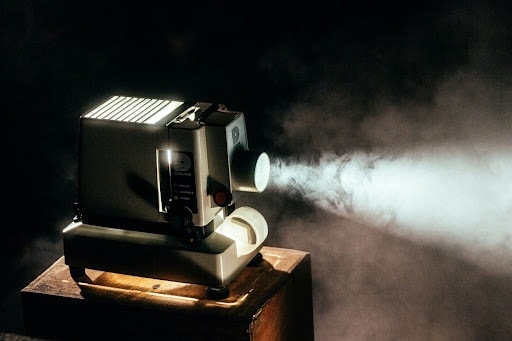
So, you are getting ready to take your first video production projects to the next level?
To work at a top video production company, you need to think about detailed plans regarding writing a script, bringing the camera, shooting, and whatnot
My friend, the video production process might sound as simple as ABC, but it isn’t. It contains several phases, and each is very important to the final output of the final product.
Since marketers are gaining 66% more leads from video, you will need to invest more effort in planning, scripting, shooting, and editing. (Source: G2)
So, we have gathered this comprehensive guide. Here, you will get a step-by-step blueprint for creating a high-quality video.
These steps are for all seasoned filmmakers and budding content creators to boost confidence in the video production process.
| A Quick Glimpse of the Steps of The Video Production Process: → Pre-production: Planning, scripting, and organizing resources. → Production: Preparing the set and capturing footage. → Production: Editing, visual effects, and finalizing the video. → Distribution: Share the completed video with your audience. |
Pre-Production: A Deep Dive

1. Concept Development: The Foundation
The starting point is for you to develop a concept. This is the foundation of any successful video project. From here, you will begin shaping your creative vision. Things you will be doing are as follows:
- Brainstorming: Take a high road to unleashing your creative potential at full speed. Start using techniques like mind mapping, free writing, or group brainstorming to come up with A-one ideas. Encourage your wild and unconventional thinking process at this stage.
Example: Let’s say you are making a video for a newly launched smartphone. Here, you can make a short film featuring close-up shots and adding humor to attract viewers. This way, you can highlight its impact on daily life.
- Idea Refinement: Now that you have a draft of many ideas, narrow down your options. Factors you can consider here are feasibility, target audience appeal, budget, and alignment with your overall targets.
Example: Based on your ideas for the smartphone video, you can choose an option. These options will include production costs, the availability of locations, and the potential impact on the audience. That’s all.
- Mood and Tone: Once you have chosen a clear concept, set the emotional atmosphere you want to create in the video. It can be humorous, dramatic, inspiring, or informative.
Example: If you take a smartphone, the tone will be more energetic and playful, whereas concepts like climate change require a more serious and informative approach.
- Audience Research: Now, do thorough research on your audience. This research will give you details about your target audience. You can find this information by conducting surveys, social media analysis, and competitor research.
Example: If you are making a video about athletic wear, you can research online surveys to learn what the athletic wear audience prefers.
- Needs and Wants: Pinpoint your audiences’ problems or desires for the particular products. You will have to answer these questions through the video.
Example: Your athletic wear audience might want comfort and stylish clothing that feels good during workouts. So, you will highlight these parts in the video. Simple!
- Purpose: Now is the time to tell what the primary purpose of the video you are making is. Is it to inform, entertain, or inspire?
Example: Smartphone commercials mostly persuade viewers to purchase the product.
- Call to Action: Your video must convince the audience to take the next step. If it does this, you will be successful.
Example: When you encourage viewers to contact the company or visit the shop, they do it. That’s what a successful CTA looks like.
2. Scriptwriting: The Core Of Your Video
You cannot proceed with your ideas without a script. The scripts will contain the outlines for the dialogue, action, and visuals to match the narrative.
- Script Format: You can follow the industry standard script format. It is mostly screenplay or teleplay format for clarity and professionalism.
Example: Add scene headings, character names, dialogue, and action descriptions.
- Character Development: Make the characters of the script compelling. Give them personalities, names, and backstories.
Example: Show the character in the video having physical appearances, speech patterns, and emotional arcs.
- Dialogues: Write natural and engaging dialogue that complements the characters’ personalities. This will move the story forward.
Example: Add relatable dialogue that doesn’t sound overly formal or staged.
- Pacing: You can control the story’s rhythm by varying the length of other screen time, dialogue, and action sequences.
Example: By dilating or contracting a scene, you can make it faster for the action sequences and slower for analyzing the characters’ interaction scenes.
- Structure: The plot of a script must be divided into the following parts: the introduction, development, and conclusion.
Example: You can add an act structure for the protagonist’s life journeys.
3. Storyboarding: Visualizing Your Script
Storyboarding is like a comic strip version of your script. You will represent the sequence of every shot in your video. It is utilized as a tool for planning and communication during the video production process.
- Visual Representation: Create sketches or drawings of each scene. It will include the camera angles, character positions, and important actions.
Example: You can use digital tools or simple drawings on paper to create storyboarding.
- Shot Selection: When choosing the shots, break down the entire script into scenes. Then, use the most effective camera angles and shots that describe more stories.
Example: Other techniques can be applied to make scenes more interesting: close-up, wide shot, or shot from over the shoulder.
- Sequencing: Sequence is important when creating the storyboard. The sequence needs to maintain logical order to create a smooth flow.
Example: You will compile the shots in a manner that arranges each shot to tell a clear and compelling story.
- Timing: Each shot of the video will have a specific duration. These durations will help you to keep the pace of the video.
Example: Try using time codes or estimated times for each storyboarding panel.
- Visual Communication: Share your storyboard with the director, cinematographer, and other actors to get their feedback.
Example: Use storyboarding as a visual reference in a pre-production video with other crew members.
4. Budgeting: Estimating Costs and Allocating Resources
Estimating Costs
When you know how much of your budget will be needed for video production, it’s easier to find the financial resources and avoid overspending. You will make sure that you have broken down the video production process into parts to assign a budget for each.
Key Cost Categories
- Equipment Rentals: Determine the cost of cameras, lenses, lighting, sound gear, and other gear that may be required for the project.
- Crew Salaries: Predict the salary for the scriptwriter, director, editor, and other members of the crew.
- Talent Fees: Create a budget for actors, voice-over artists, or camera talent.
- Production Design: Budget for transportation, meals, accommodations, props, wardrobe, and other set construction.
- Post-production Costs: Add expenses for paid editing software, music licensing, visual effects, and color grading.
- Marketing and Distribution: Expenses that will go for promoting your video and distributing it on various social media.
- Contingency Fund: Keep a budget for unexpected costs as well.
Cost Estimation Techniques
- Top-down Approach: Start with a total budget, then allocate the percentage according to the categories.
- Bottom-up Approach: Find the estimated costs of each item and sum them up together.
- Three-point Estimation: Determine each item’s optimistic, most likely, and pessimistic costs.
- Historical Data: You can use previous project data as a reference to make the budget.
Allocating Resources Effectively:
Now that you have your budget ready, you can start allocating resources to bring all the funds together.
- Prioritization: Begin with the areas of the project that are essential to kickstart the production. Allocate resources for those areas first.
- Resources Optimization: Try to find all the possible ways to maximize the value of your resources. For instance, you can lease equipment instead of being required to purchase it.
- Cost-Benefit Analysis: Determine the possible value that you’re likely to derive from each of your spending.
- Regular Monitoring: There is no scope for overspending in any area. So, keep monitoring where and why the budget is being spent and, if needed, make adjustments.
- Contingency Planning: Keep a portion of the budget to deal with unexpected expenses.
Additional Tips For Budgeting:
- Be Realistic: Try to avoid any unnecessary expenses.
- Use Budgeting Software: If you want, you can use tools to help with calculations and tracking.
- Regular Reviews: Keep evaluating the budget throughout the production process.
- Involve The Entire Team: You can get input from other members by including them in the project.
5. Location Scouting: The Perfect Set

Our next stop is finding the location for the video production process. It’s important to choose a visually stunning place to film a video that will captivate viewers and align with the overall concept. Location is where your video begins to physical form.
Choosing the Right Locations
- Alignment With The Story: When you choose the location, it has to complement the video’s perspective and enhance the narrative.
Example: While a dark and moody atmosphere looks perfect for a thriller, a vibrant and bustling city square suits a romantic comedy genre.
- Proper Location: The right location benefits your video subject and helps with finding accommodation, parking, and nearby amenities. You will find resources that smooth the work for you and your crew members.
Example: A beach location is a stunning place to shoot, but it can be a little tricky if there is no nearby accommodation or rental.
- Legal and Safety: It is your responsibility to ensure that your crew members and actors feel safe. You will need to provide proper safety wherever you go and always consider whether the place has any restrictions. In several locations, you will have to get permission from the local authority before you film there.
Example: In places like national parks, permits and restrictions on noise levels and impacts on wildlife might be required.
- Budget: Budget is the main factor in scouting the location. You need a location that will fit your budget for location fees, permits, and transportation costs.
Example: If your budget is low, filming in public parks or landmarks will not require additional fees.
- Visual Appeal: The location should be visually appealing and exciting to the viewers. It will give the video an overall look and feel.
Example: A modern, minimalist loft apartment could be the perfect backdrop for a tech startup video.
Obtaining Necessary Permission
We mentioned this in our legal and safety section when scouting a location. Let’s give you a general overview.
- Private Property: Before you begin filming, obtain a written agreement from the owner or property manager of the location you are using.
- Public Spaces: There are public areas where filming is not restricted or fees are charged. However, it is still mandatory to ask for permission from local authorities.
- Commercial Establishment: Filming in commercial places requires permission from business owners to utilize their premises.
- Event Venues: If you are covering an event, secure the organizers’ permission to avoid misunderstandings.
- Talent Releases: To protect yourself from legal issues, you might need signed releases from people associated with your video or the names you are using.
6. Assembling the Crew: Building The Team
Once you have secured your location, how about building your dream team? A well-rounded team will help you use all the vision and resources you have gathered for the video production.
Identify Key Roles
- Director: He is the one you will use as a visionary to oversee the entire production. The director will give you everything from the concept to the final cut. They will make creative decisions on your behalf. He will not only make the decisions but also manage the crew and ensure that your project is ready within the budget and deadline.
- Camera Operators: The man behind the captivating visual elements for the video. They operate the camera, set up shots, and capture outstanding footage that meets the director’s vision.
- Sound Engineer: He will handle the audio recording and mixing of the video. His work ensures that the dialogue is clear, the sound effects are on point, and the music is well-balanced with the video.
You might think that’s all you need. However, depending on the complexity of your project, other core roles may be required. We are adding a few more; check it out.
- Producer: A person who will manage logistics, budgets, and scheduling.
- Script Supervisor: He will keep track of continuity and script changes.
- Gaffer: He is in charge of lighting.
- Editor: Hiring a professional to assemble the footage into a final product.
- Colorist: He will adjust the colors and tone for your video.
Hiring Professionals or Using In House Talents
We would say the decision to hire professionals or use in-house talent depends on personal choices, although a few factors can influence the decisions.
| Factors | Professionals | In-house Talent |
| Budget | It can be costly, but they often bring expertise and experience. | It is affordable but requires more professional skills and equipment. |
| Project Scope | High production values may require a professional crew. | Simple projects are easier to manage with in-house talents or freelancers. |
| Timeline | Professionals can work efficiently, but availability is limited. | In-house talents are flexible with any schedule. |
| Skill Set | Professionals come with a variety of skills. | The house team also has skills and experience in certain areas. |
Example: Let’s say you are filming a small corporate video. In these kinds of videos, you can use employees with video experience as camera operators and editors. However, if you are aiming for a high-end commercial, then it would be wise to employ a professional to bring a professional feel to the video.
7. Scheduling: The Blueprint
Without a schedule, you cannot go far. You will have to have a well-structured schedule to keep the video production going. If you follow our advice on an ideal schedule, there will be no delay in project turnover for you.
Creating a Production Timeline
Start by setting a production timeline. This timeline will be applied from the beginning of the project to the final production. It will include key milestones, deadlines, and dependencies between different tasks.
Key Components of a Production Timeline:
- Pre-production: screenplays, places for filming, talent search, team mobilization, movie equipment, licenses, board, and outlooks.
- Production: Recording, shooting, and coordination work of the scenes.
- Post Production: Editing, sound design, visual effects, color grading, and final delivery.
Tools for Creating a Timeline:
- Use Excel or Google Sheets for basic scheduling.
- Tools like project management software for complex projects.
- Paid software for specialized video production scheduling
Planning Shoot Days
Once you have the timeline, you can break down the production phases into specific shoot days.
7 Factors to Consider When Planning Shoot Days
- Location Availability: Make the schedule according to the location availability and potential conflicts.
- Talent Availability: Ask for the availability of other crew members, including actors, models, and talent.
- Equipment Availability: Plan for equipment rental and transportation.
- Crew Availability: Schedule the shoot day when all the crew members are on board.
- Lighting Condition: Choose the best daylight or time to capture the perfect shots based on the lighting.
- Weather: Consider weather forecasts before heading for filming. Have backup plans for outdoor shoots in case of inclement weather.
- Efficiency: Put similar scenes together to minimize setup and break-down time.
Example: If you are thinking of shooting a corporate video with interviews and a B-roll, you might schedule the interview days in a studio and the remaining days to film exterior shots at different locations.
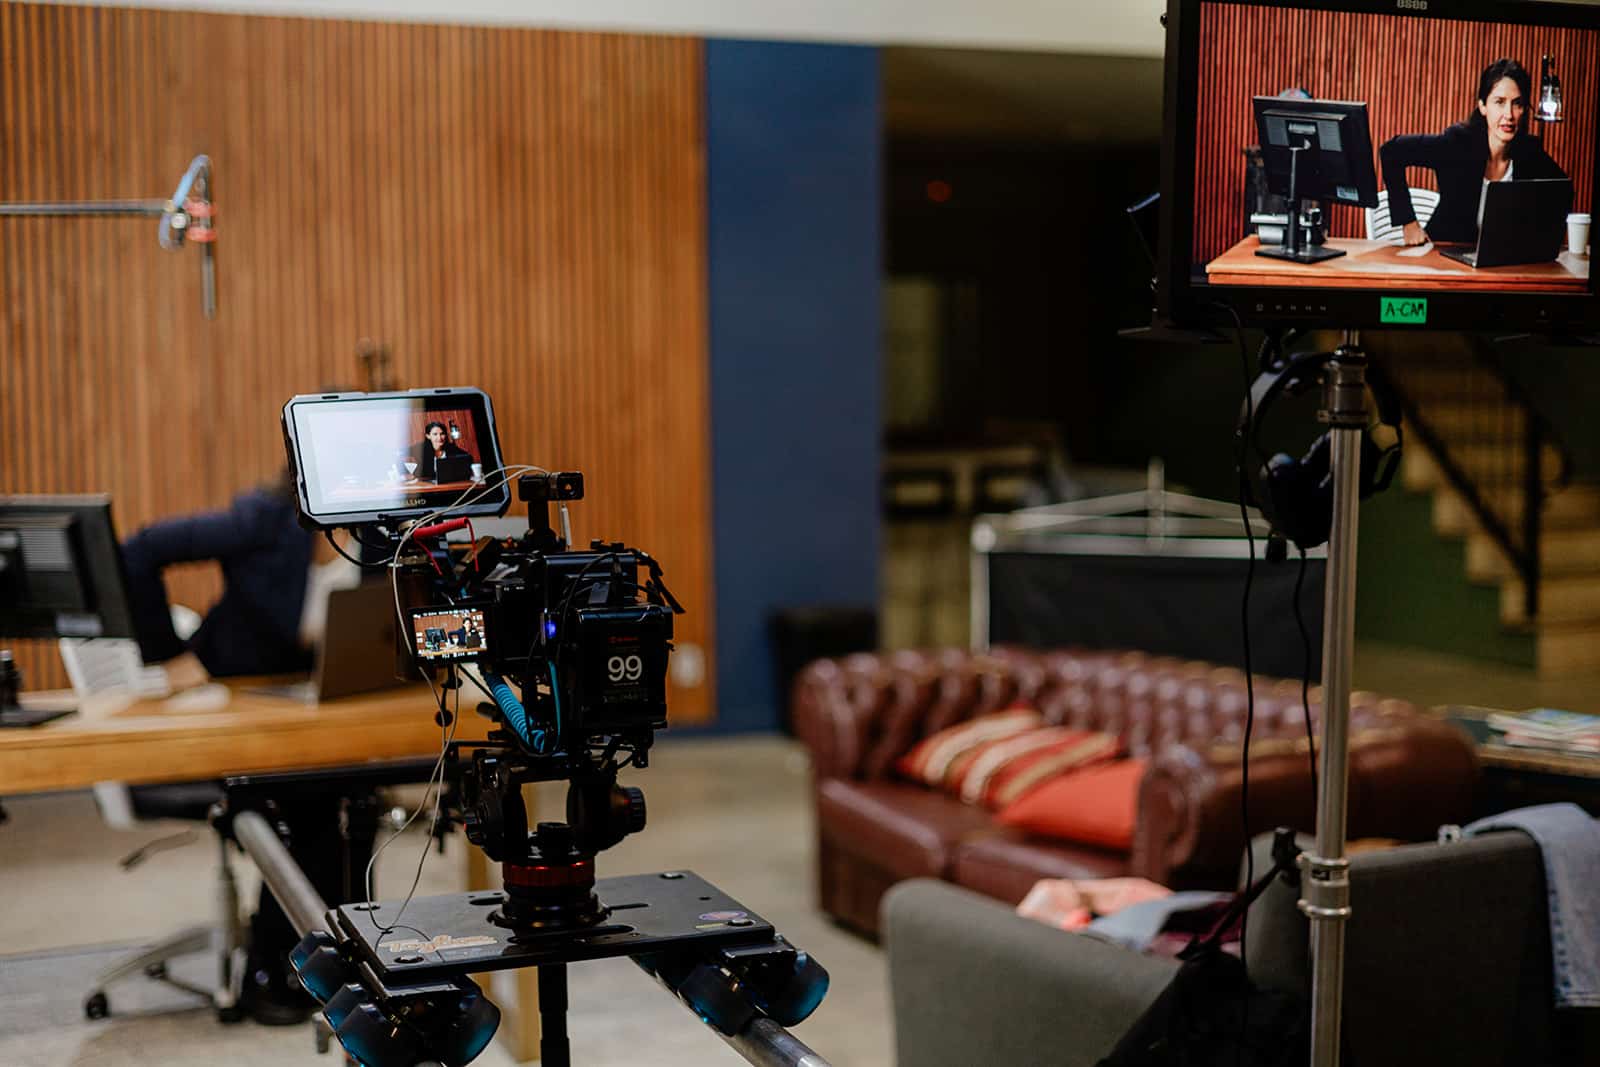
Production: Setting Up
We have prepared all the resources you will need to produce a perfect video. In the second stage, which we call production, you will utilize all the elements you have collected to make the video happen. In simple language, production will transform your vision into a tangible reality. The initial step is to set up your production environment.
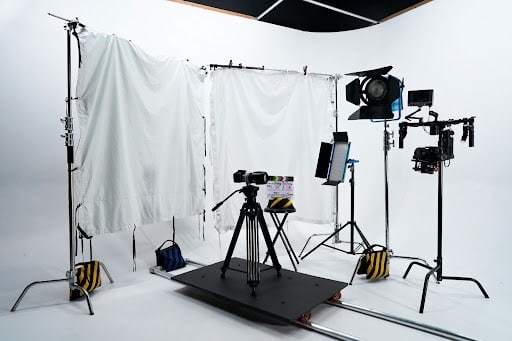
Setting Up: Preparing The Set and Equipment
Once you have the necessary equipment, you can’t just start filming the right way. You will need to set it up properly for smooth filming, which provides the visual foundation for your story.
Set Design and Decoration
- Style and Mood: Your set should reflect the atmosphere that you want in your video. For example, modern, sleek settings are for high-end product videos, while rustic environments are for documentary filming.
- Colour Platte: One major factor is to evoke emotion in your video without even uttering a word. You will need to choose color schemes that can enhance the video’s visual impact.
- Props and Set Dressing: When setting up, only place items that have a purpose. Props are significant items that convey the story, establish character, or create visual interest.
Example: For a detective-type video, props like magnifying glasses and old books can reinforce the character’s profession.
- Set Construction: If you are building your own set from scratch, ensure that the set is strong, safe, and aesthetically proper. It should also be of average weight, fire resistant, readily portable, and collapsible for storage.
Equipment Placement
- Camera Position: The camera angle should be a main portrait if you want to capture different heights and distances for the subjects. This will give your shots a different perspective to the audience. Never stop experimenting with different angles to find the most compelling viewpoint.
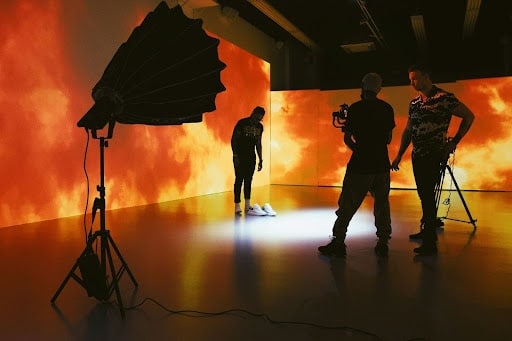
- Lighting Setup: Proper lighting setup will create depth, mood, and focus on the screen. You can use key lights, fill lights, and blacklights to control shadows and highlights.
Example: To create dramatic portraits, a three-point lighting set-up is a classic technique.
- Sound Equipment: If you don’t want interpreted audio quality, position the microphone in the right place to capture clear audio. Depending on the scene, you can use boom, lavalier, or shotgun microphones.
- Monitor Placement: Place the monitor right in front of the director, camera operator, and sound engineer; they will easily have access to see the footage and audio levels.
Conducting Technical Checks
- Camera Settings: Start checking that your camera is rightly positioned, white-balanced, and focused.
Example: Take a picture of an object and try moving it closer and farther from the camera lens to know how the autofocus responds. Also, review the battery status so that it doesn’t get drained before you are done with the shooting.
- Sound Levels: Perform a multi-voice check on the microphone to determine whether the audio is clear.
Example: Check the audio levels and give a test audio clip to check for background noises or distortion.
- Lighting Balance: Ensure the lights are working in the color temperature you want.
Example: Adjust the lighting angle to achieve the desired mood and atmosphere, and read the light meter to ensure proper atmosphere.
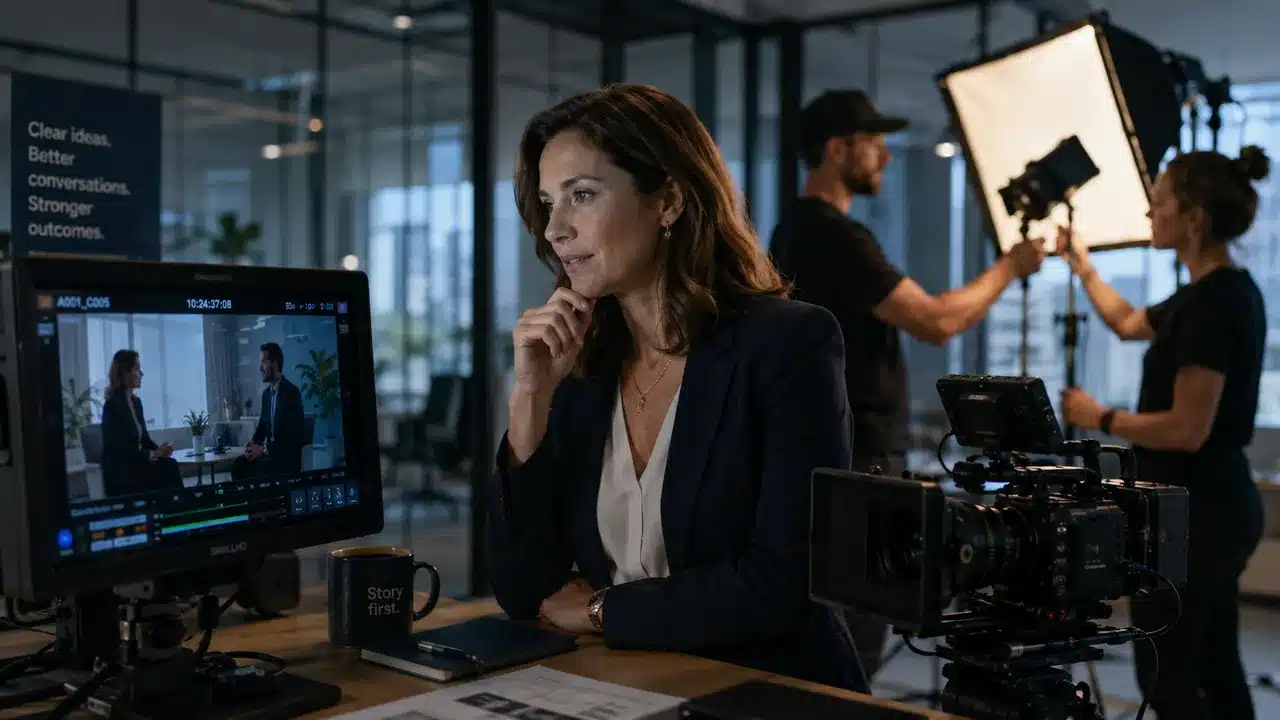
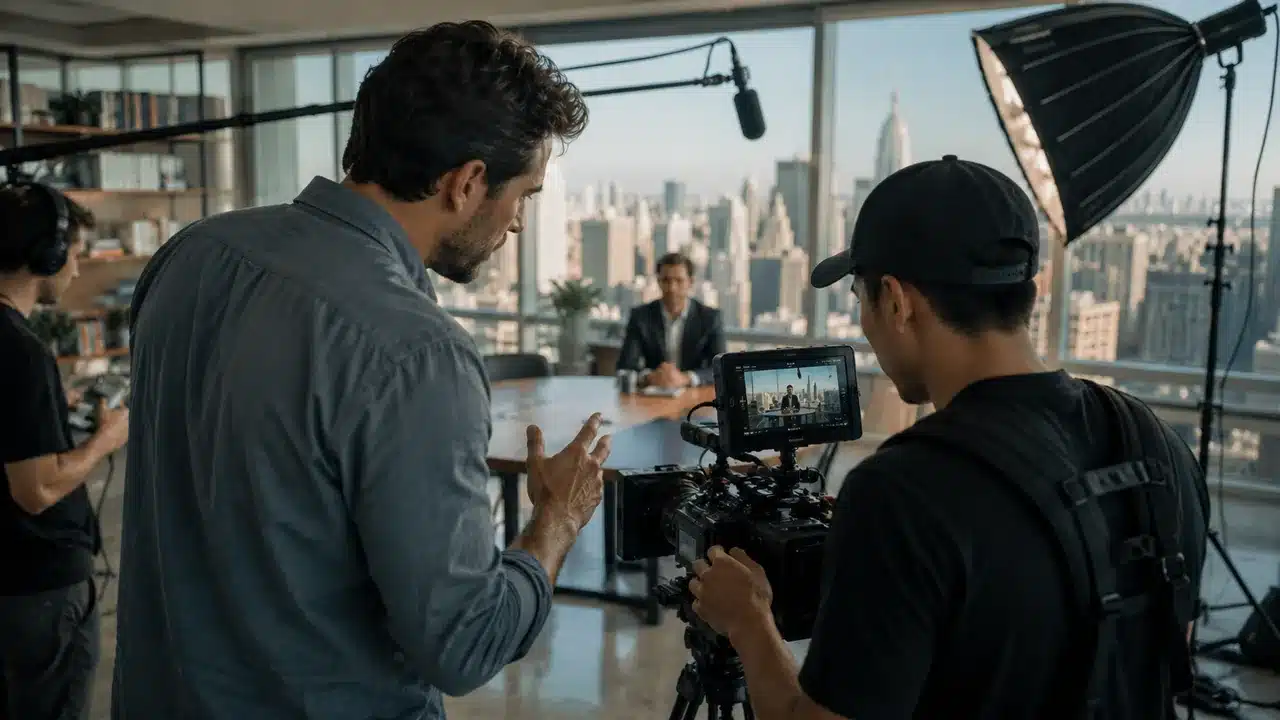
Filming: Bringing the Vision to Life
Filming is the balance of art and technical precision. This is the part where your script and storyboard will be made into reality and where you’ll get to display your creativity. Well, are you ready to start making your ideas a reality?
Capturing The Planned Scenes
- Shot Lists: We have talked multiple times about the shots and how they emphasize the characters’ personalities and features of the products from different angles. So, it will be beneficial to have a detailed list of shots you want to implement.
Example: The shot list that you could use in shooting a product commercial could be the shots of the product area, product details, and other kinetic shots of the product.
- Collaboration Between Director and Cinematographer: Ensure that your director and cinematographer share a common goal. Their alignment will decide how the video turns out in the filming stage. Where the director conveys the desired mood and story, the cinematographer will translate that vision into visual language.
Example: For horror scenes, the director might want Cinmatrogher to have a lower camera angle and dark, shadowy lighting to create a scary sense.
- Script Supervisor: When you hire a script supervisor, you guarantee that all the scenes are accurate and have continuity. They will also ensure that the characters and the set have the props and that the wardrobe is on point in every take.
Example: If a character wears a meaningful watch in one scene, he will also need to have that same watch in the subsequent scenes.
Ensuring High-Quality Footage
- Camera Settings Mastery: Before you can apply camera settings, you must first know about exposure, white balance, shutter speed, and other fundamentals. These settings can transform a bland capture into an extraordinary view.
Example: A wide aperture used in a landscape shot provides shallow depth and separates the subjects, while a narrow aperture will provide more depth.
- Lighting Techniques: Lighting utilization makes it possible for one to come up with whatever effects or moods they desire.
Example: High-key light gives a light, happy, and contrasting tone, whereas low-key light gives gloomy, dramatic, and tense scenes.
- Audio Capture: People should attempt to use the best microphones possible to capture all of the sound without interference from noise.
Example: When actors deliver their dialogue, a boom operator ensures it sounds clear and deliberate, while a lavalier microphone discreetly records their sound.
- Camera Movement: Camera movement can enhance visual storytelling. Major movements include Pan sweeps, Tilt moving the camera vertically, Dolly moving back and forward, and others.
- Frame Composition: Every element needs to be arranged in the frame to create visual storytelling. Standard farming composition techniques include the rule of thirds, leading lines, and the golden ratio.
Directing: The Art of Storytelling
It isn’t an exaggerating phrase in video production if a filmmaker says direction is the heart and soul of filmmaking. It might sound easy, but the whole process involves a complex interplay of creativity, technical knowledge, and skills.
Direction For Actor
- Character Development: Give a full briefing about the characters’ motivation, personalities, backstories, and emotional journey to the actors.
- Performance Coaching: Provide the actor with guidance on acting techniques, such as method acting, improvisational acting, or naturalistic acting.
- Feedback: While rehearsing, the actors require constructive feedback and suggestions to enhance their performance.
Crew Management
- Clear Communication: Try to communicate clearly with the crew about the vision you want in the set.
- Task Delegation: Assign crew members their responsibilities and take reposts on whether they are doing the work and whether they understand their roles.
- Problem Solving: Ask them what problems they face while working and give proper solutions for those.
- Team-Building: Create a fun and positive environment on set so that everyone, from crew to actors, works comfortably.
Maintaining The Vision and Style
- Storytelling: Make the narrative clear, understandable, engaging, and emotionally resonant.
- Visual Style: Create a stunning visual look through different camera angles, lighting settings, and framing composition.
- Pacing: Control the rhythm of the film and ensure the scene maintains consistency throughout the video.
- Tone: Maintain the atmosphere of the video with proper color grading to evoke the emotion you want audiences to feel.
- Collaboration: Work closely with the cinematographer, editor, and other important creatives to bring the vision to life through the lenses.
Example: Let’s say your director wants to create a neo-noir film. For that, he will need to guide the cinematographer in using low-key lighting, deep shadows, and Dutch angles. He will also direct the actors to deliver their lines slowly and portray a sense of detachment in their sense.
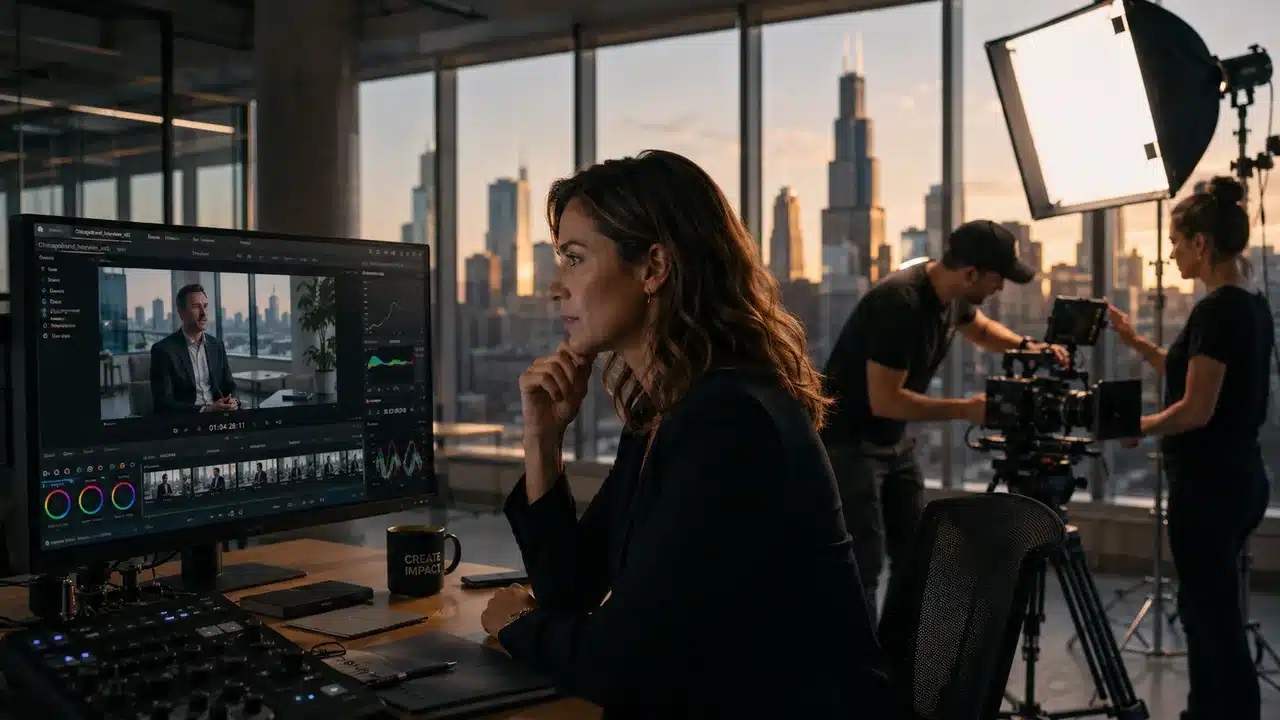
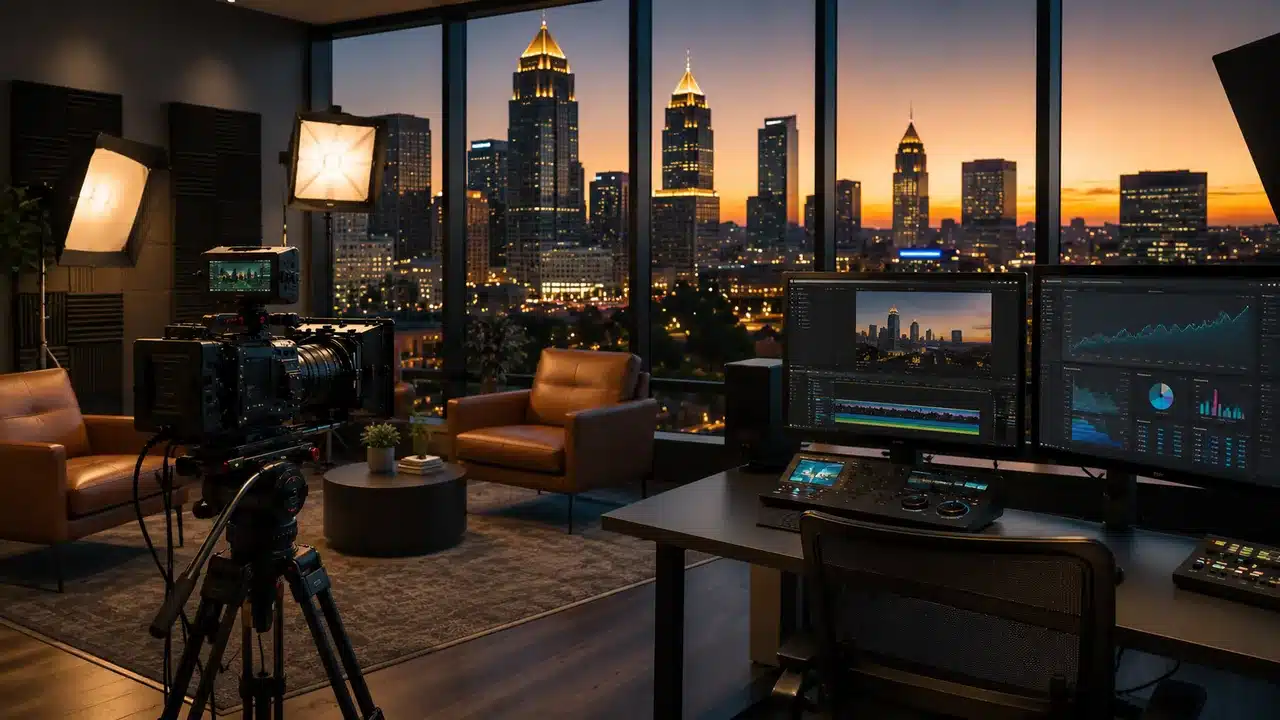
Post-Production: A Deeper Dive
We are now in the final stage of the video production process. This is the stage where your raw footage and sound are turned into the polished final product—a final video that will be shown on your audience’s screen.
Editing: The Art of Storytelling
It’s time to shape and arrange your footage. The videos you have taken throughout the editing process will be smoothed out to look more refined and precise.
- Cutting and Assembling The Footage
- Shot Selection: Choose the best takes, which is narrating the story the most.
- Rearranging: Logically structure the footage so that it is easy to access. The footage should have a beginning, middle, and end section.
- Pacing: Control the pace to maintain the rhythm and tempo of the footage.
- Continuity: Ensure every footage has consistent progression.
- Rough Cut: Make a first draft of the video by assembling clips in a sequential order.
- Timecode Management: Synchronizing audio and video accurately.
- Timeline Creation: Arrange all the clips on the editing software to begin your editing process.
- Trimming: Start editing the length of the clips to get the desired pacing and flow.
- Sequencing: Arrange the clips in an orderly to create a precise narrative.
- Adding transitions and effects
- Cuts: There should be immediate switches between shots.
- Dissolves: Use gradual fading of one shot into another.
- Wipes: One shot replacing another with a defined shape.
- Fades: Transitioning to or from black or white.
- Push and Pull: Moving the images on or off the screen.
- Visual Effects: Creating imaginary elements or altering reality.
- Motion Graphics: Adding animated texts. Logos or graphics.
- Color Correction: Adjust the color balance and contrast of each clip.
- Color Grading: Give me the clips a specific look or mood.
- Stabilization: Smoothing out shaky footage.
Sound Design: Crafting The Audio Landscape
Sound design is where you put the audio your audience wants to hear. Through the sound, you will create the auditory environment of a film or video. These sounds are mostly sound effects, dialogues, music, and ambiance to connect the audience to the story.
- Mixing and Editing Audio
- Sound Library Creation: Create a collection of sound effects, such as ambient sounds and music, that perfectly complement the video.
- Field Recording: Take real word sounds to make the visuals look more authentic.
- Dialogue Editing: Cleaning up the dialogues and enhancing spoken words.
- Leveling: Adjust the volume of different audio tracks to match the visuals to get a balanced sound mix.
- Panning: Move your sound anywhere in the stereo and surround sound field to create depth.
- Equalization: Modify the frequency content of sound to enhance or reduce specific elements.
- Limiting: Control the dynamic range to prevent audio peaks and inconsistent volume.
- Reverb: Adding structural elements to sounds to create a sound of space and atmosphere.
- Automation: Creating smooth transitions and changes in levels over time.
For instance, in scenes with heavy dialogue, the audio mixing should be precise to ensure the audience can hear the dialogue distinctly. The background music and sound effects should also be subtly mixed to enhance the narrative.
- Adding Music and Sound Effects
- Music Selection: Go for those sounds that complement the visuals and can evoke emotions.
- Music Editing: Add sound effects that will fit specific scenes and pacing.
- Sound Effect Integration: Placing the sounds in a way that reinforces the visual actions and creates tension or humor in the video.
- Trimming and Synchronization: Align the sound effects with the visual timecode for precision and impact.
- Atmosphere: Generate an immersive environment through layers of ambient sounds.
Color Correction: The Fine-Tuning

Color correction helps your video achieve a consistent look across all images or videos. It is a crucial part of post-production since the video’s overall mode and atmosphere depend on it.
Key Aspects of Colour Correction
- White Balance: The first step of color correction is white balance. It adjusts the color temperature of videos or images to make them look more realistic.
- Exposure: Give the images accurate brightness and contrast.
- Color Saturation: Control the intensity of colors.
- Hue: It brings changes to the dominant colors of a pertinent color spot.
- Lift, Gamm, Gain: Adjust the shadows, mid-tones, and highlights, among other aspects.
Achieving Consistency
- Reference Frame: Select shots with accurate colors as a baseline for comparison.
- Color Matching: Adjust the sequence shots to match with the reference frame.
- Look Up Table: You can apply pre-designed color correction profiles for efficiency.
Setting The Mood
- Color Palette: Choosing a perfect color scheme to create a specific atmosphere.
- Contrast: Enhancing and reducing contrast to give a dramatic effect or subdued look.
- Saturation: Increasing or decreasing saturation for vibrant or muted colors.
- Temperature: Using warm and cool tones to stimulate different emotions.
Examples
- Horror films use desaturated colors and cool tones to create deep shadows for a suspenseful atmosphere.
- Romantic comedy videos employ warm tones and increased contrast for vibrant colors representing happiness and love.
- The documentary maintains accurate colors to portray the scene realistically.
Visual Effects: Bringing Imagination To Life
Visual effects are a gift from digital artistry that creates imaginary reality in film, television, and other media. They are the magic behind mind-bending transformations, incredible creatures, and impossible scenarios.
Key Components of VFX
- Pre-visualization: Before starting the shoot, plan how to use visual effects that will go with the concept.
- 3D Modeling: Creating captivating digital graphics of objects, characters, and environments.
- Animation: Turn your 3D models into dynamic, expressive creations with lifelike movement.
- Compositing: Blending real-life video with computer-generated imagery.
- Simulation: Making realistic effects like fire, water, thunder, and explosion.
Common VFX Techniques:
- Matte Painting: Creating imaginary or realistic backgrounds or environments.
- Motion Capture: Capturing the movement of a human or animal to make digital characters look real.
- Keying: Isolating elements from their colors or backgrounds for compositing.
- Particle System: Replicates the effects of rain, storms, or explosions.
- Digital Double: Creating a digital stand-in of an actor for dangerous scenes.
Examples
- Creating fantastical creatures like Dragons, Unicorn, aliens, and mythical beings.
- Transforming the environment into futuristic cities, alien planets, or underwater worlds.
- Adding explosions and bullet impact to improve action sequences.
- Removing unwanted elements like wires, green screens, or other distractions.
Final Review: The Finishing Touches
Here, we are in the final review, where we will wrap up the entire process by evaluating the project. In these steps, you can make one last time change or adjustment before you let the distribution start.
Reviewing The Final Cut
- Story Consistency: Make sure the narrative flow is smooth without any disturbance or illogical.
- Pacing: Checking if the video has an engaging rhythm one after the other clips.
- Visual Consistency: Verifying that the visual style of each frame contains the same consistency.
- Audio Quality: Look after the clarity and balance of sounds throughout the video.
- Color Grading: Evaluating the color scheme and how it is creating an impact on mood.
- Special Effects: Ensuring the VFX looks flawless and improves the story.
- Expert Feedback: Seek input from professionals in the industry to get their critical evaluations.
Making Necessary Revisions
- Timecode Accuracy: Correct any issues that mess up the synchronization between audio and video.
- Error Correction: Fixing technical errors, such as grammatical errors or visual glitches.
- Refinement: Making subtle changes to improve paving, color, or sound mixings.
- Additional Footage: Add new footage if needed or remove it to boost the story.
- Conforming to Standards: Ensuring the projects meet broadcast or distribution requirements.
Distribution: Finding The Right Platforms

Once you have made the video, you need to find the right platform to reveal it to a mass audience. This is also a cruel part since it will determine the success of your video. The hard work you have put into the video will finally be shown to the audience.
Choosing Platforms
Understanding Your Audience
- Demographic: Find out who the potential audience is—their age, gender, location, and interests.
- Platforms: In which platforms are your audiences most likely to use or be active?
- Content Preference: What type of content do your audiences like and engage with?
Analyse Platform Strengths
- YouTube: YouTube has a massive reach and diverse audiences worldwide. It also has strong search capabilities and monetization options.
- Vimeo: This platform offers top-notch video playback, an audience of professionals, and a lively community for interaction.
- Facebook: You can draw a larger user base and diverse content formats to advertise the videos in various forms.
- Instagram: If you want to attract a younger audience with appealing visuals, then Instagram will help you emphasize storytelling.
- TikTok: The videos are in short form and can go viral.
- LinkedIn: The network or audience is primarily professional and B2B audiences.
Optimization For SEO
SEO is here to help you become visible to your target audience. They will make sure that your video content shows up right on search engines. To do so, you will need to use SEO effectively so that your video is more discoverable.
Using Keywords and Tags
- Keyword Research: Use tools like Google Keyword Planner or SEMrush to find relevant keywords related to your video content.
- Keyword Placement: Incorporate the relevant keywords into your video without stuffing them. You can include them in the title, description, and tag sections.
- Tag Optimization: Adding both broad and keywords improves the visibility of the articles posted on the platform.
- Long-Tail Keyword: it is recommended to use longer and more precise key phrases to target the smaller circle of users.
Writing Compelling Titles and Descriptions
- Clear and Concise: Portrait the whole video’s purpose in fewer but straightforward words.
- Keyword Integration: Naturally incorporate relevant keywords that go with the video content.
- Strong Call To Action: Encourage viewers to watch the video.
- Descriptive Language: Use vivid words to create interest and excitement.
- Length Optimization: Maintain the platform-specific character limits.
Promoting The Video
With that done, it is high time to bring this video to the audience so they can share it with their families and friends and, therefore, get their valuable opinions. It is the social media that offers the best opportunity for that. Here they are, step by step, of how you can effectively employ it so it can be maximized to its full potential.
Sharing Your Video on Social Media
- Platform Selection: Choose the platforms where your audience is most active. These can be Facebook, Instagram, or YouTube, among others.
- Content Optimization: Keeping each platform in mind when creating the video, for example, it should be a 60-second video for TikTok but could be ten minutes for YouTube.
- Captions: When uploading videos, it is useful to provide captions so that people can follow along, in case they have their sound off, or have difficulties with hearing.
- Hashtags: Make relevant and trading hashtags to gain more visibility on the video.
- Call To Action: Motivate viewers to do like, comment, share, and subscribe.
Engaging With The Audience
- Respond To Comment: Show appreciation to your audiences by responding to comments now and then.
- Ask Questions: Try to have conversations with audiences by asking questions in your posts.
- Run Contests or Giveaways: One of the best ways to gather more audiences and engagement is through sharing.
- Collaborate With Others: Partner with influencers or other channel owners to get more views.
- Live Streaming: Interact with the audience in real time to get to know the audience closely.
Measuring Success
The following action after uploading the video is to check the status of the video. A key aspect of the video’s utilization is the analysis of its effectiveness in the process. This entails analyzing metrics and gathering feedback from the audience. Only by doing so can you make data-driven choices.
Analysing metrics
- Views: Know the total number of views the video has been viewed by.
- Watch Time: How much time do the audiences spend watching your videos?
- Click-Through Rate: The percentage of people who click on your videos after seeing them in search results or on social media.
- Engagement Rate: How many likes, comments, and shares are under the post?
- Audience Retention: How long do viewers stay engaged with your videos?
- Demographics: Information about your video viewers, such as their age, gender, and location.
Interpreting Feedback
- Comments: Analyze the viewer’s comments to identify the strengths and weaknesses.
- Ratings and Reviews: Pay attention to the overall ratings and specific comments.
- Social Media Mentions: Track discussion about your video on social platforms.
- Survey and Polls: Gather direct feedback from your audience.
Adjusting Future Strategies Based on Performance
- Identify Trends: Look for the patterns in your data to understand what works best for you.
- Experiment: Keep an open mind to test different approaches to check the content.
- Set Goals: Set a specific objective for your next video and what you want to achieve from it.
- Iterate: Continuously work on your strategy based on performance data.
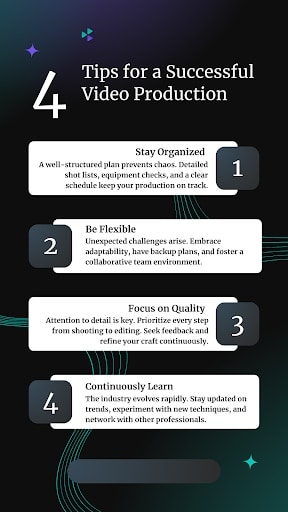
Tips for a Successful Video Production
Your Journey to Video Success
So, how was the entire tour? We don’t think there is anything left to cover. We have covered all the essential steps from initial planning to final delivery. Remember, a well-organized script, the right direction, and a focus on quality are the pillars of impactful videos. Now, it is your turn to shine! Fill yourself with this knowledge and get yourself ready to embark on your own project. If there is still confusion, reach out to LocalEyes to expose yourself to their full possibilities.
Frequently Asked Questions
There are three steps in video production: pre-production (Planning, scripting, budgeting, team assembly), Production(Filming, recording audio, and capturing footage), and Post-production (Editing, color correction, sound design, and finalizing).
Video capture: Recording raw footage.
Video editing: Assembling clips, adding transitions, and VFX.
Video encoding: Converting video files for different platforms.
Video distribution: Uploading and sharing the finished video.
Planning: Define goals target audience, and create storyboarding.
Shooting: Capturing footage with a camera and microphone.
Editing: Assemble clips, add music, and refine visuals.
Distribution: Share the video on relevant platforms.
It involves pre-production planning, on-set execution, post-production editing, and final delivery.
The whole process of video production is essential, so choosing one step is tricky. As the pre-product lays the groundwork for a project, it is a crucial step in the process.
The easy way to not spend more than your budget is to plan carefully, prioritize only the essential equipment, negotiate rates, and optimize post-production time.
You should choose advanced camera lenses, microphones, editing software like Premiere Pro and Final Cut, color grading tools, and audio setups.
It depends on the project’s complexity and length; typically, it lasts weeks to months.
It is simple: use relevant keywords, optimize titles and descriptions, engage with viewers, and share on social media.

Founder at LocalEyes Video Production | Inc. 5000 CEO | Emmy Award Winning Producer