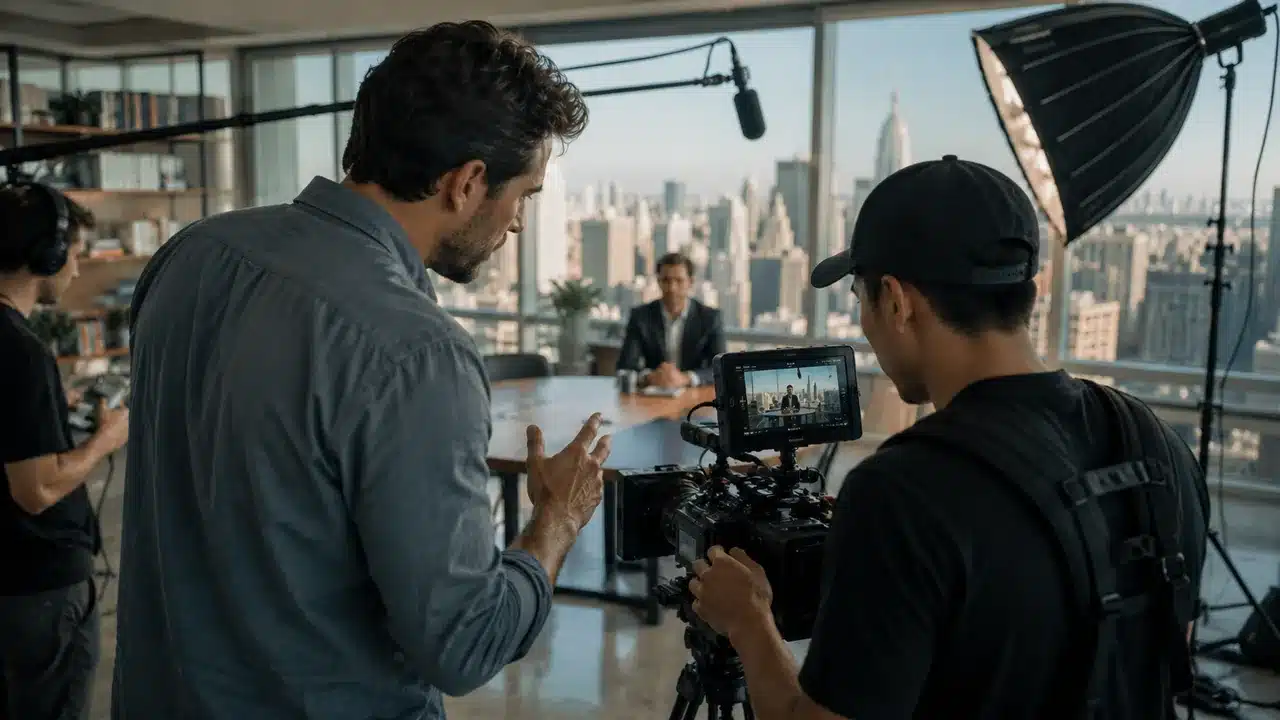
Some scenes just feel cinematic. Even before anyone says a word?
When we talked to our filmmakers, they revealed that it is all about lighting. They said it’s not just about making things visible.
Lighting makes things emotional, atmospheric, and sometimes downright magical.
So, we picked 7 types of lighting in the film. Here, you will get a glimpse of each.
| Lighting Technique | Description | Purpose / Effect | Common Usage |
| Three-Point Lighting | Uses key, fill, and backlight to create depth and balance | Shapes the subject, adds dimension | Interviews, narrative film, portraits |
| Soft Light | Diffused light with gentle shadows | Flattering, natural, romantic, or emotional tone | Romance, beauty shots, interviews |
| Hard Light | Sharp, focused light with defined shadows | Tension, clarity, intensity | Horror, thrillers, dramatic emphasis |
| High-Key Lighting | Bright, low contrast, minimal shadows | Creates a cheerful, clean, or upbeat mood | Comedies, commercials, and lighthearted scenes |
| Low-Key Lighting | High contrast, deep shadows, minimal light | Builds tension, mystery, or drama | Thrillers, noir, suspense scenes |
| Motivated Lighting | Lighting that mimics a natural or practical source within the scene | Maintains realism and visual continuity | Realistic drama, naturalistic storytelling |
| Side Lighting (Chiaroscuro) | Lighting from the side to create strong contrast and shadow | Adds depth, mood, and visual interest | Dramatic scenes, portraits, artful shots |
| Backlighting & Kicker | Light from behind or side-back to highlight edges | Adds depth, and separation from the background | Cinematic portraits, silhouettes, stylized shots |
Top 7 Cinematic Lighting Techniques
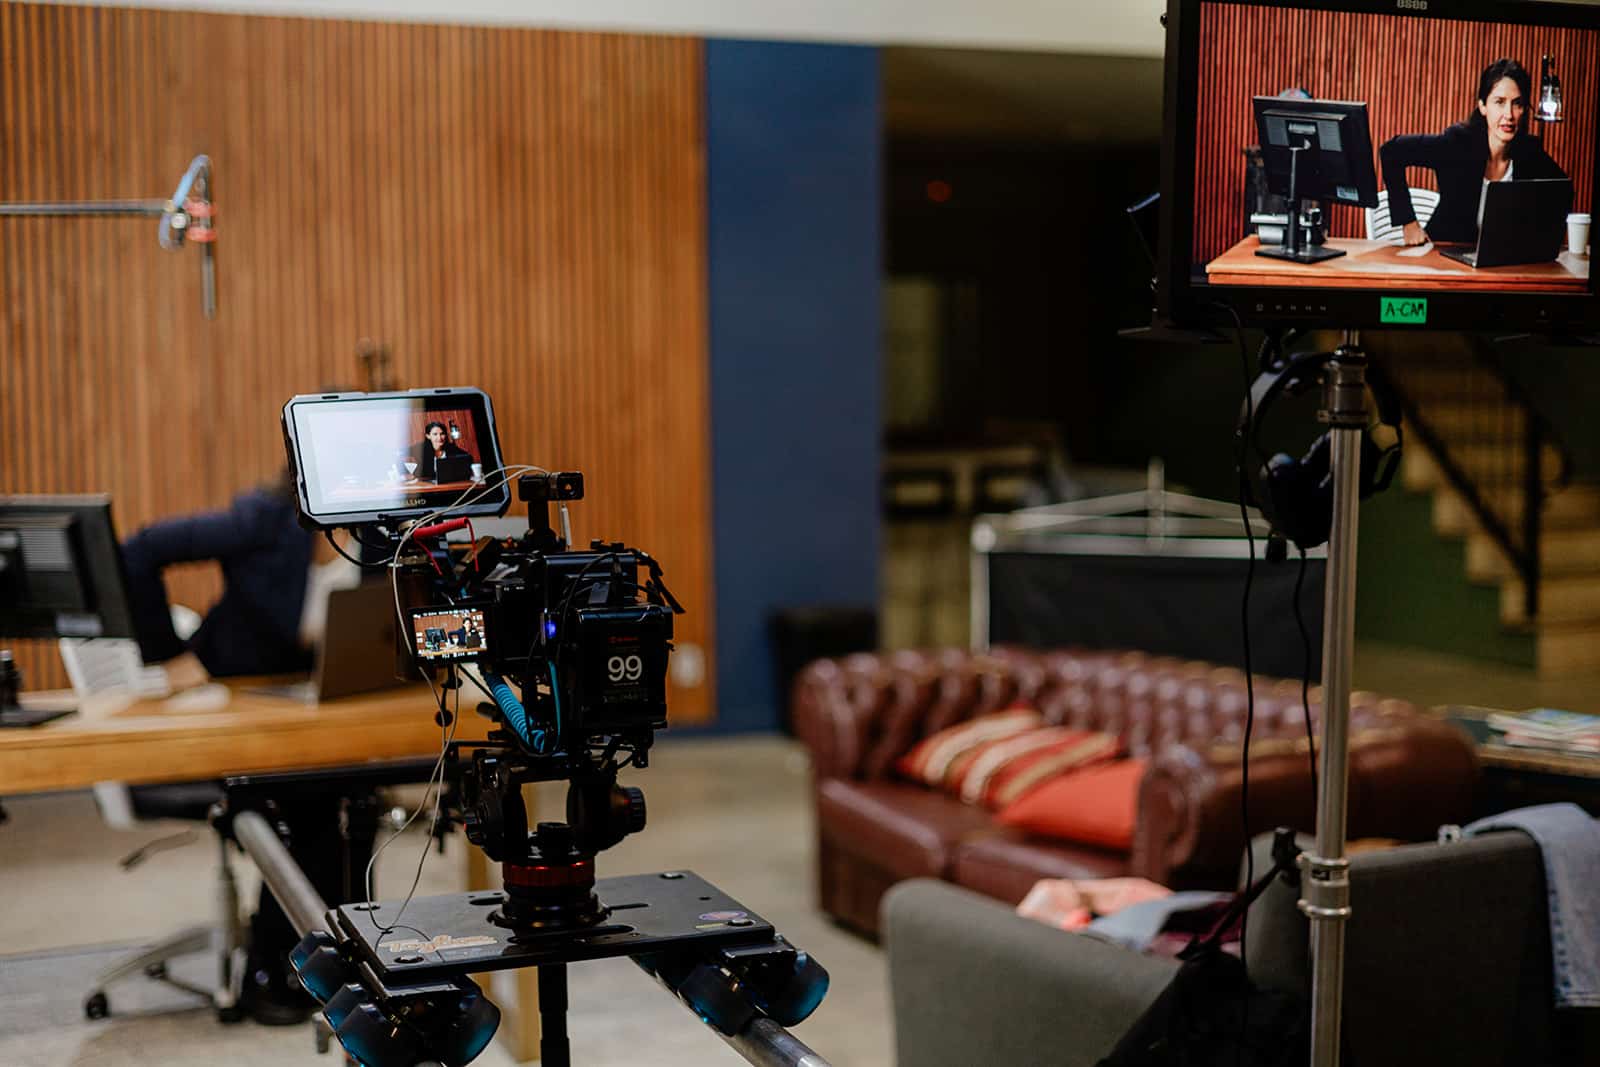
Lighting setup is a classic technique used in photography, filmmaking, and even video calls to make a subject look more visually appealing.
We have picked 7 lighting techniques that will give depth and dimension to your visuals.
1. Three-Point Lighting Setup
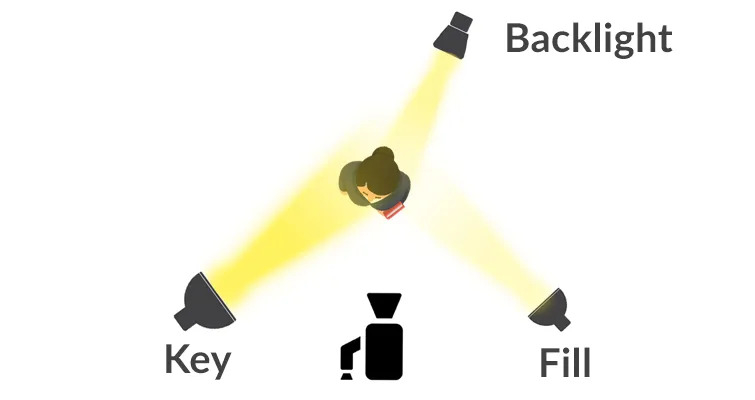
[Three-Point Lighting and Color Temperature Basics | Shutterstock]
Key Light
This is the main source of light in the setup.
- It’s usually placed at a 45-degree angle from the subject
- It provides the strongest illumination
- Defines the overall look of the scene
- It can create strong shadows depending on how intense or soft the light is
Fill Light
This light softens and balances the shadows created by the key light.
- Placed on the opposite side of the key light, also at an angle.
- Typically softer and less intense than the key light.
- Helps keep the subject’s features clear without looking flat.
Backlight
This one separates the subject from the background.
- Placed behind the subject, slightly above or off to the side.
- Creates a subtle outline or glow, giving the subject a sense of depth.
- Especially helpful in adding a professional, cinematic look.
How Three-Point Lighting Shapes Subjects and Sets the Scene
When used together, these three lights:
- Create dimension by balancing light and shadow.
- Add focus to the subject by guiding the viewer’s eye.
- Help define the mood.
- Bright and even lighting looks open and friendly
- Make high-contrast setups feel dramatic
- Give control over how the subject interacts with the background
2. Natural Lighting Techniques
Natural Lighting Techniques focus on making the most of sunlight. It is free, powerful, and beautiful, but also unpredictable.
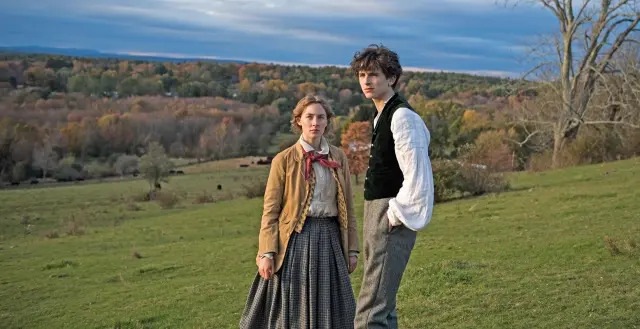
[Source: The Little Women]
Utilizing Natural Light Effectively
Understand the quality of light:
- Soft light (like during early morning or late afternoon) is diffused and flattering.
- Harsh light (midday sun) creates strong shadows and highlights.
Use directional light:
- Position your subject so that the light shines on it from the side or at an angle.
- Backlighting (the sun behind the subject) creates a warm glow or silhouette.
Golden hour magic:
- The hour after sunrise and before sunset gives soft, warm, and flattering light.
- It’s ideal for portraits, outdoor scenes, and emotional storytelling.
Shade is your friend:
- If the light is too harsh, move your subject into the open shade for softer, more even lighting.
Modifying Natural Light
Natural light isn’t always perfect. With a few tools, you can shape it like a pro:
Bounce Cards:
- Use white or silver surfaces, like a white wall or sheet, to reflect light back onto the subject.
- Helps fill in shadows, especially under the eyes or chin.
Flags:
- These are opaque materials (like black foam boards)
- Used to block or reduce light
- Useful to control spills or prevent overexposure in specific areas
Diffusers:
- Thin white fabric or commercial diffusers placed between the sun and your subject
- Great for high noon or bright sunny days.
Location Scouting & Timing
- Scout your location at different times of day to see how light behaves
- Where the sun rises and sets.
- What natural reflectors (like walls or water) or blockers (like trees or buildings) are around.
- Plan your shoot around the light you want
- Golden hour, blue hour, or even cloudy days for soft light
Relatable Reads: A Guide for Cinematographers: The Key to the Secrets of Raw Video Footage – LocalEyes
3. Soft Lighting vs. Hard Lighting
The quality of shadows and how light wraps around a subject. Understanding the difference helps you precisely shape your scene’s mood and tone.

[Source: Reddit]
Soft Lighting
Soft light creates gentle, diffused shadows. It wraps around the subject, reducing harsh lines and giving a smooth, even glow.
How it’s created:
- Using large light sources or diffusers
- Bouncing light off a surface
- Shooting during overcast weather or golden hour
Visuals:
- Shadows have soft edges or may be barely noticeable
- Skin looks smoother
- Backgrounds tend to blend softly
Used for:
- Romantic scenes: Warm, dreamy lighting makes subjects look more flattering and emotionally close
- Dramatic or emotional moments: Soft light helps focus on facial expressions without distraction
- Interviews or beauty shots: Flatter facial features and minimize imperfections
Tools:
- Softboxes, diffusion panels, sheer curtains, reflectors
Hard Lighting
Hard light produces sharp, well-defined shadows and high contrast between light and dark areas.
How it’s created:
- Small, direct light sources (like the midday sun or a bare bulb)
- No diffusion or bounce
Visuals:
- Shadows are crisp with hard edges
- High contrast (bright highlights, dark shadows)
- Texture and lines are more pronounced
Used for:
- Tense or suspenseful scenes: Adds grit, realism, and intensity
- Film noir or crime genres: Emphasizes drama and moral ambiguity
- Dramatic portraits or stylized fashion: Makes features pop and adds visual punch
Tools:
- Bare bulbs, focused spotlights, and harsh natural light
4. High Key and Low Key Lighting
High-key and low-key lighting are two contrasting styles used to set the mood and tone of a scene through light and shadow.
High-Key Lighting
High-key lighting is a bright, evenly lit setup with very little shadow or contrast.
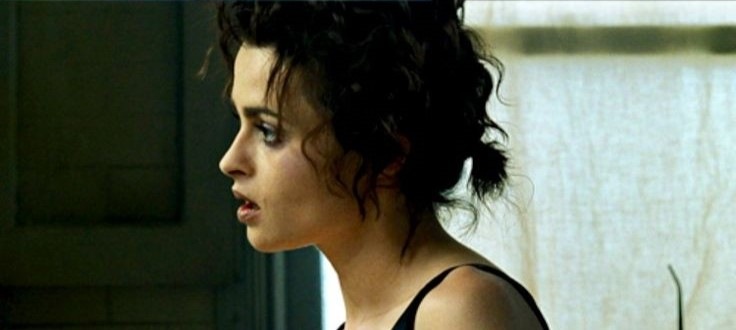
[Source: Fight Club]
Mood & Effect:
- Feels light, open, cheerful, and clean
- Often used to convey happiness, innocence, or an upbeat tone
- Minimizes distractions, letting the subject shine
Characteristics:
- Soft shadows or none at all
- Often uses multiple light sources or large, diffused lighting
- Bright backgrounds with few dark areas
- Balanced exposure across the frame
Common Uses:
- Comedies, sitcoms, and commercials
- Beauty and fashion photography
- Corporate or lifestyle videos
- Scenes meant to feel safe, clear, or uplifting
Low-Key Lighting
Low-key lighting uses high contrast, deep shadows, and minimal lighting to create a moody, dramatic effect.
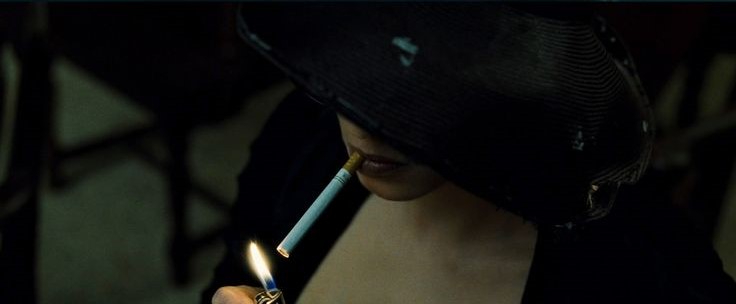
[Source: Fight Club]
Mood & Effect:
- Feels mysterious, tense, or intimate
- Often associated with danger, secrecy, or moral ambiguity
Characteristics:
- Strong shadows and dark backgrounds
- Very few light sources, often just one key light
- Little to no fill light, creating hard edges and silhouettes
- Common use of negative space
Common Uses:
- Thrillers, horror, and noir films
- Portraits with emotional depth
- Scenes involving conflict, secrecy, or suspense
5. Motivated Lighting
Motivated Lighting is a technique in which all the lights in a scene appear to come from real, believable sources within the environment.
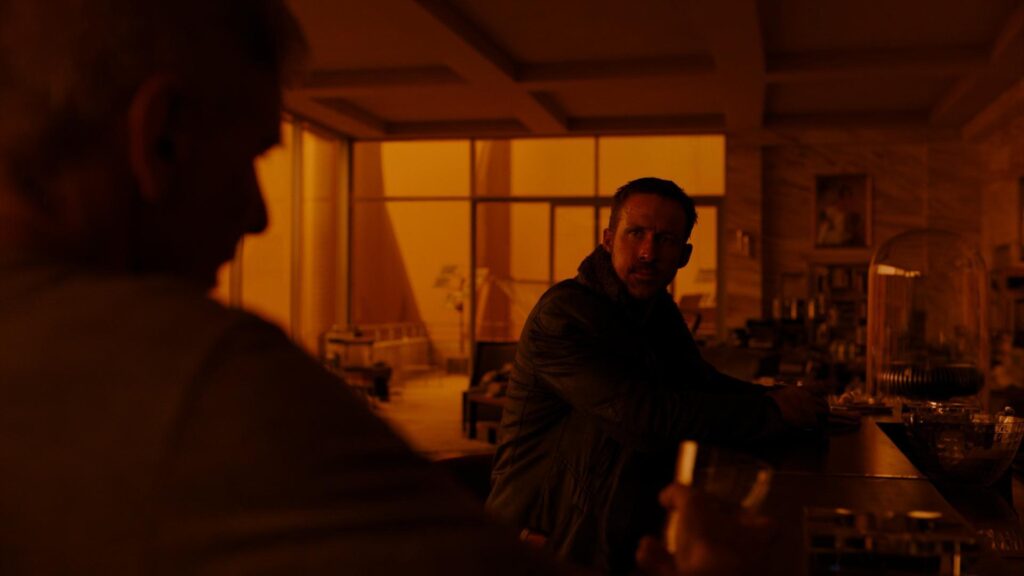
[Source: Blade Runner 2049]
What is Motivated Lighting?
- It means the light in the scene is “motivated” by something visible
- It is like a lamp, window, candle, TV, or streetlight
- They’re set up to mimic or enhance the practical light sources shown on screen
Why Motivated Lighting Matters
- Enhances realism: The scene feels natural and immersive to the viewer
- Maintains visual continuity: Viewers can “see” where the light is coming from
- Adds emotional weight: Lighting that feels real supports the mood without distracting
- Helps storytelling: A flickering candle or harsh sunlight can subtly reinforce the tone of a scene.
6. Practical Lighting in Film
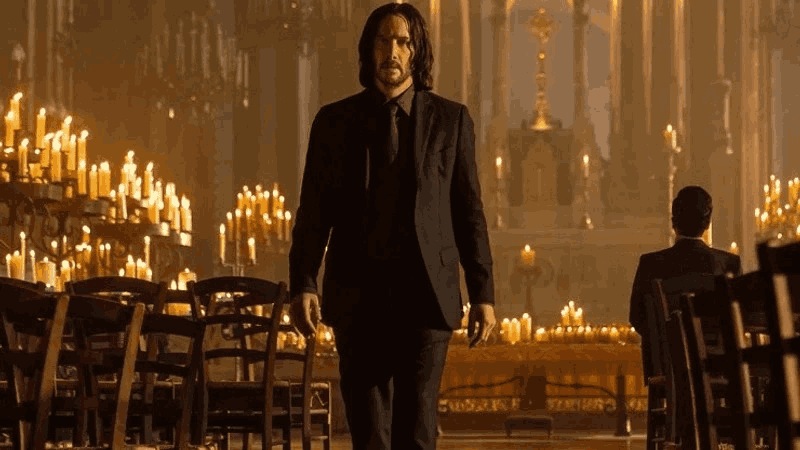
[Source: John Wick 4]
Practical lights are the actual lights visible in the shot, like:
- Table lamps
- Overhead fixtures
- Computer screens
- Fireplaces or candles
- Neon signs or headlights
These are often used as motivations for the lighting design. You can:
- Boost them with hidden film lights to control the brightness
- Gels and dimmers help match color temperature or tone
- Shape the light so it looks like it’s only coming from the visible source
Example Scenarios:
- A character lit by a window: You position an intense, soft light outside the window to mimic daylight.
- A tense moment by a fridge light: Use a cool, focused source that looks like it’s coming from inside the fridge.
- A dramatic scene lit by a TV glow: Set a soft blue light near the actor to simulate the flicker.
7. Creative Lighting Techniques
Creative Lighting Techniques go beyond basic visibility. They help shape mood, define characters, and make visuals more compelling.
Side Lighting (Chiaroscuro)
Lighting the subject from one side, leaving the other side in shadow. This technique is inspired by Renaissance painting. It is called chiaroscuro (Italian for “light-dark”).
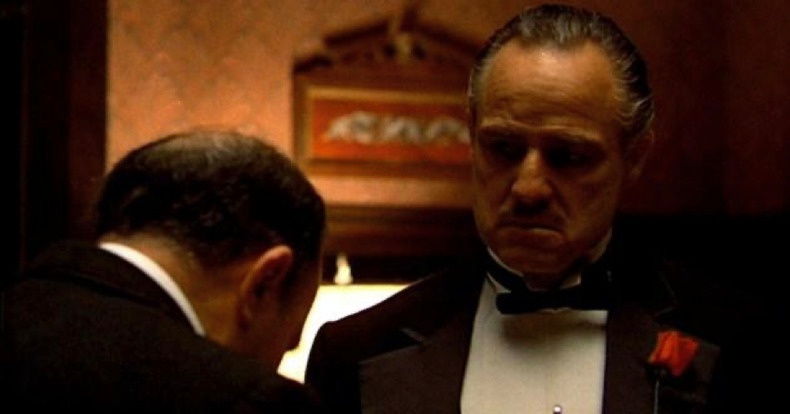
[Source: The Godfather]
Mood & Effect:
- Creates drama, mystery, and emotional tension
- Emphasizes texture, structure, and contrast
- Ideal for portraits, film noir, or introspective moments
When to use it:
- To show internal conflict or highlight a character’s dual nature
- In moody interviews or dramatic storytelling
- When you want to shape the face or figure with strong shadows
Backlighting and Kicker Lights
Backlighting:
- Placing light behind the subject, facing toward the camera
- Creates a rim or halo effect that outlines the subject
Kicker Lights:
- A type of accent light placed at an angle behind the subject
- It usually goes off to one side
- Gives an extra pop or shine to the edge of the face or body
Mood & Effect:
- Adds depth and separation from the background
- It can create a dreamy or dramatic silhouette
- Useful for action scenes, emotional beats, or stylized portraits
Color Lighting (Gels or RGB Lights)
Using colored lights or gels over light sources to influence the emotional tone of a scene.
Mood & Atmosphere Examples:
- Blue: Cold, sad, night, lonely
- Red: Danger, passion, urgency
- Green: Unnatural, eerie, sometimes sickly
- Purple or pink: Fantasy, surreal, or romantic
Use it for:
- Music videos, stylized drama, sci-fi, or dream sequences
- Visually cueing emotions without words
- Creating a thematic color palette across scenes
Relatable Read: What Are the Different Camera Shots? – Expert Visual Guide – LocalEyes
Tools and Tips for Effective Cinematic Lighting
Tools and Tips are all about getting that polished, professional look, even on a tight budget.
1. Diffusion Materials for Soft Light
Diffusion softens harsh light. It reduces shadows and creates a flattering, cinematic look.
Common Diffusion Tools:
- Softboxes: Box-shaped attachments that diffuse light evenly
- Diffusion gels: Thin plastic sheets placed over lights (like opal or silk)
- Scrims and silks: Large fabric panels used outdoors or with big lights
- Frosted shower curtains: Cheap and effective for softening light
2. Using Reflectors and Bounce Boards
These help you redirect light and control shadows. It works better with natural lighting or minimal gear.
Types of Reflectors:
- White: Neutral, soft fill light
- Silver: Bright, crisp bounce (great for low light)
- Gold: Adds warmth to skin tones
- Black: Used as a flag to block light or deepen shadows
DIY Bounce Boards:
- Foam core boards from an art store
- White cardboard or poster board
- Aluminum foil wrapped around cardboard
Use cases:
- Fill in shadows on a face during interviews
- Bounce sunlight indoors through a window
- Add catchlights in the eyes with subtle light lift
3. Budget-Friendly Lighting Gear Hacks
You don’t need high-end equipment to get cinematic results. Here are some creative, low-cost options:
Lighting Hacks:
- Clamp lights from hardware stores: Great for quick setups
- Smart bulbs or LED strips: Change colors and brightness with your phone
- China ball lanterns: Soft, 360° light; just add a dimmable bulb
- DIY flags: Use black fabric, cardboard, or even black T-shirts
- Work lights + parchment paper: Strong lights softened with baking parchment
- Phone flashlight + tissue paper: Emergency key light or accent with softening
Check out Film Clapperboard: Your Essential Tool for Professional Video Production – LocalEyes
3 Common Mistakes to Avoid in Film Lighting (And How to Solve)
Avoiding common mistakes can make the difference between a professional-looking scene and one that feels off or distracting.
Here are the things you should watch out for:
1. Flat Lighting
Lighting that’s too even or front-facing. It eliminates depth and dimension.
Why it’s a problem:
- Makes the subject look lifeless or overly plain
- No shadows, no shape, no mood, no drama
- Feels unnatural, especially in narrative film
How to fix it:
- Use a three-point lighting setup (key, fill, back)
- Introduce shadows strategically
- Position your key light at an angle, not straight on
2. Unflattering Shadows
Hair Shadows on the Face or Wall
- Caused when light hits the hair sharply
- It casts weird patterns
- Noticeable with overhead lights or hard side lighting
Reflections in Glasses
- Light bouncing off glasses can distract viewers or hide the actor’s eyes
- Common with direct front lighting
Solutions:
- Raise or lower your key light slightly so it misses the glasses’ surface
- Tilt the glasses just a bit if it fits the scene
- Use a polarizing filter
- Soften the light to reduce hard shadows
3. Ignoring Ambient and Changing Light
Why it’s a problem:
- Natural light shifts can cause inconsistency in shots
- Mixing color temperatures creates color balance issues
Tips to manage ambient light:
- Scout locations at the time you plan to shoot to observe light changes
- Use blackout cloths or flags to control stray light
- If using daylight, shoot consistently in the same part of the day
- Set white balance manually, not on auto, to avoid color shifts between shots
Let’s Set the Mood!
These are the basics of a cinematic lighting setup. Once you get the hang of these, you’ll learn about more advanced techniques for deeper scenes.
At LocalEyes, we have lighting pros who know exactly what lighting to use to highlight different areas. You can totally hire us to ensure you capture the best scenes in the perfect lighting!
Frequently Asked Questions: Top Cinematic Lighting Techniques
How to light cinematically?
What are the three main methods of lighting in filmmaking?
• Practical lighting: Visible lights within the scene.
• Artificial lighting: Professional lighting setups like LEDs, HMIs, or softboxes.
What is the 3 lighting rule?
• Fill light: Softens shadows
• Backlight: Adds separation and depth
What is the top lighting in the film?

Executive Producer at LocalEyes Video Production | Emmy Award Winning Producer